Making beaded animals is a fun and creative way to express yourself. It’s a great way to make unique gifts for friends and family, or to just have a fun craft project to do. With a few basic supplies and some patience, you can create beautiful beaded animals of all shapes and sizes.
In this guide, we’ll go over the basics of how to make beaded animals, from choosing the right beads to assembling the pieces. With a little practice, you’ll be able to make beaded animals that are sure to impress.
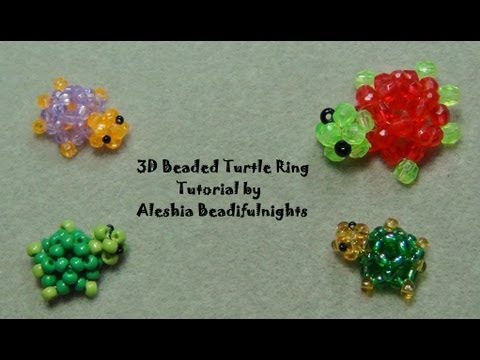
Step-by-Step Guide to Making a Beaded Turtle
Welcome to the wonderful world of beading! Today, we’re going to make a cute and colorful beaded turtle. This project is perfect for beginners, so let’s get started!
Step 1: Gather Your Supplies
First, you’ll need to gather your supplies. You’ll need a variety of beads in different colors and sizes, a beading needle, beading thread, and scissors.
Step 2: Thread Your Needle
Next, you’ll need to thread your needle. Cut a length of beading thread and thread it through the eye of the needle. Tie a knot at the end of the thread to secure it.
Step 3: Create the Turtle’s Body
Now it’s time to start creating the turtle’s body. Start by stringing a few beads onto the thread. Make sure to leave enough space between the beads so that they don’t touch each other.
Step 4: Create the Turtle’s Head
Once you’ve created the turtle’s body, it’s time to make the head. String a few larger beads onto the thread to create the head. Make sure to leave enough space between the beads so that they don’t touch each other.
Step 5: Create the Turtle’s Legs
Now it’s time to create the turtle’s legs. String a few smaller beads onto the thread to create the legs. Make sure to leave enough space between the beads so that they don’t touch each other.
Step 6: Create the Turtle’s Tail
Once you’ve created the turtle’s legs, it’s time to make the tail. String a few larger beads onto the thread to create the tail. Make sure to leave enough space between the beads so that they don’t touch each other.
Step 7: Secure the Beads
Once you’ve created the turtle’s body, head, legs, and tail, it’s time to secure the beads. Tie a knot at the end of the thread to secure the beads in place.
Step 8: Enjoy Your Creation!
Congratulations! You’ve just created a cute and colorful beaded turtle. Now it’s time to enjoy your creation!
Crafting a Beaded Butterfly: Tips and Tricks
Crafting a beaded butterfly is a fun and creative way to add a unique touch to any project. Whether you’re making a beaded necklace, bracelet, or even a keychain, a beaded butterfly will add a beautiful and whimsical touch. Here are some tips and tricks to help you create your own beaded butterfly.
First, you’ll need to gather your supplies. You’ll need some beading wire, beading needles, and a variety of beads in different sizes and colors. You can also use charms or other decorations to add a special touch.

Once you’ve finished stringing the beads, you can attach the wings to the body. You can use a beading needle to sew the wings onto the body. Make sure to use a strong thread so that the wings stay in place.
Finally, you can add any decorations you’d like. You can use charms, sequins, or other decorations to give your butterfly a unique look.
Crafting a beaded butterfly is a fun and creative way to add a unique touch to any project. With these tips and tricks, you’ll be able to create a beautiful and whimsical beaded butterfly in no time!
How to Create a Beaded Frog with a Few Simple Supplies
Creating a beaded frog is a fun and easy craft project that can be done with just a few simple supplies. All you need is some colorful beads, a needle, and some thread.
To start, thread your needle with a length of thread. Then, begin stringing the beads onto the thread. You can use any combination of colors and sizes that you like. When you have enough beads to make the body of your frog, tie a knot at the end of the thread.
Next, you will need to make the legs. To do this, thread two more lengths of thread onto the needle. Then, string the beads onto each thread, making sure to leave enough room between the beads for the legs. When you have enough beads for the legs, tie a knot at the end of each thread.
Now, it’s time to assemble your frog. Take the two threads with the legs and tie them together at the top of the body. Then, tie the two threads together at the bottom of the body. This will form the shape of the frog.
Finally, you can add some eyes and a mouth to your frog. To do this, simply thread two small beads onto the needle and tie them onto the head of the frog. You can also add some extra details, such as spots or stripes, to make your frog even more unique.
And there you have it! With just a few simple supplies, you can create a beaded frog that is sure to bring a smile to your face. Have fun crafting!
Crafting a Beaded Fish: A Beginner’s Guide
Welcome to the wonderful world of beading! Crafting a beaded fish is a fun and creative way to express your artistic side. Whether you’re a beginner or an experienced beader, this guide will help you create a beautiful beaded fish that you can proudly display in your home.
First, you’ll need to gather your supplies. You’ll need a variety of beads in different sizes and colors, a beading needle, beading thread, and scissors. You can find these supplies at your local craft store or online.
Once you have your supplies, it’s time to start beading! Begin by threading your needle with the beading thread. Then, start stringing the beads onto the thread in the pattern of your choice. You can create a simple pattern or get creative and make a more complex design.
Once you’ve finished stringing the beads, it’s time to shape your fish. Start by tying a knot at the end of the thread. Then, carefully shape the beads into the shape of a fish. You can use your fingers or a pair of tweezers to help you shape the beads.
Finally, you’ll need to secure the fish. To do this, tie a knot at the end of the thread and trim off any excess thread.
Congratulations! You’ve just crafted a beautiful beaded fish. Now you can proudly display your creation in your home or give it as a gift to a loved one. Enjoy your new beaded fish!
Making a Beaded Bird: Tips and Techniques for a Perfect Result
Creating a beaded bird is a fun and creative way to express your artistic side! With a few simple tips and techniques, you can make a beautiful beaded bird that will be the envy of all your friends.
First, choose the type of beads you want to use. You can use any type of beads, from glass to plastic, and even wooden beads. Choose colors that will make your bird look vibrant and alive.
Next, decide on the size of your bird. You can make a small bird or a large one, depending on the size of the beads you have chosen.
When you have finished stringing the beads, it’s time to shape your bird. Start by making a loop with the thread or wire. Then, twist the loop to form the body of the bird. You can also add wings and a tail to your bird by stringing more beads onto the thread or wire.
Finally, you can add a beaded eye to your bird. You can use a single bead or two beads to make the eyes. Once you have finished your bird, you can attach it to a necklace or bracelet.
Creating a beaded bird is a fun and creative way to express your artistic side. With a few simple tips and techniques, you can make a beautiful beaded bird that will be the envy of all your friends. So, grab your beads and get started on your own beaded bird today!
Q&A
1. What materials do I need to make beaded animals?
You will need beads, wire, pliers, and a needle and thread.
2. How do I start making a beaded animal?
Start by creating the basic shape of the animal using wire. Then, use the needle and thread to attach the beads to the wire.
3. What type of beads should I use?
You can use any type of beads you like, but it is best to use small beads for intricate details.
4. How do I make the details of the animal?
You can use the needle and thread to attach the beads to the wire in order to create the details of the animal.
5. How do I finish the beaded animal?
Once you have finished attaching the beads, you can use the pliers to twist the wire into the desired shape. You can also use glue to secure the beads in place.
Conclusion
Making beaded animals is a fun and creative way to express yourself. With a few simple supplies, you can create a unique and beautiful piece of art. Start by gathering the necessary supplies, such as beads, wire, and tools. Then, decide on the type of animal you want to make and sketch out a design. Once you have your design, you can begin stringing the beads onto the wire to create your animal. With a little patience and practice, you can make beautiful beaded animals that will be cherished for years to come.