Making beaded lizards is a fun and creative way to express your artistic side. It is a great craft for both adults and children alike. With just a few simple supplies, you can create a unique and colorful lizard that will be sure to impress your friends and family.
In this guide, we will walk you through the steps of making beaded lizards, from gathering the supplies to assembling the finished product. With a little bit of patience and creativity, you will be able to make a beaded lizard that you can be proud of.
Step-by-Step Guide to Making a Beaded Lizard
Welcome to the wonderful world of beading! Today, we’re going to make a beaded lizard. This project is perfect for beginners, and you’ll be amazed at how quickly you can make your own little lizard friend. Let’s get started!
Step 1: Gather Your Supplies
You’ll need a few supplies to make your beaded lizard. You’ll need some seed beads in two colors, a beading needle, beading thread, and a pair of scissors. You can find all of these supplies at your local craft store.
Step 2: Make the Body
Start by threading your needle with the beading thread. Then, string the beads onto the thread in the pattern of your choice. For this project, we’ll be making a simple pattern of alternating colors. Once you’ve strung the beads, tie a knot at the end of the thread to secure the beads.
Step 3: Make the Head
Now it’s time to make the head of your lizard. Start by threading your needle with the beading thread. Then, string a few beads in the same pattern as the body. Once you’ve strung the beads, tie a knot at the end of the thread to secure the beads.
Step 4: Attach the Head to the Body
Now it’s time to attach the head to the body. Start by threading your needle with the beading thread. Then, string the beads from the head onto the thread. Once you’ve strung the beads, tie a knot at the end of the thread to secure the beads.
Step 5: Make the Tail
Now it’s time to make the tail of your lizard. Start by threading your needle with the beading thread. Then, string a few beads in the same pattern as the body. Once you’ve strung the beads, tie a knot at the end of the thread to secure the beads.
Step 6: Attach the Tail to the Body
Now it’s time to attach the tail to the body. Start by threading your needle with the beading thread. Then, string the beads from the tail onto the thread. Once you’ve strung the beads, tie a knot at the end of the thread to secure the beads.
Step 7: Enjoy Your Beaded Lizard!
Congratulations! You’ve just made your very own beaded lizard. Now it’s time to show off your new creation. Put your lizard on display and enjoy your handiwork!

How to Choose the Right Beads for Your Beaded Lizard
When it comes to creating a beaded lizard, the possibilities are endless! With so many different types of beads available, it can be hard to know which ones to choose. Here are some tips to help you pick the perfect beads for your beaded lizard:
1. Consider the size of the beads. You want to make sure that the beads you choose are small enough to fit on the lizard’s body. If the beads are too big, they won’t look right and could even make the lizard look bulky.
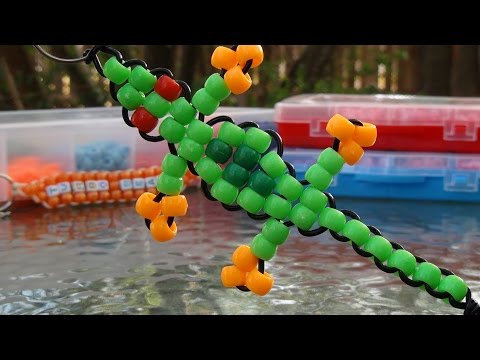
2. Think about the colors. You can choose beads in any color you like, but it’s best to pick colors that will complement each other. For example, if you’re making a green lizard, you might want to choose green and yellow beads.
3. Choose beads with texture. Beads with texture, such as faceted beads or seed beads, will add interest to your lizard.
4. Have fun! Don’t be afraid to experiment with different types of beads. You can mix and match different shapes, sizes, and colors to create a unique and eye-catching lizard.
With these tips in mind, you’ll be sure to find the perfect beads for your beaded lizard. Have fun and get creative!
Tips for Making a Beaded Lizard with a Unique Design
Creating a beaded lizard with a unique design is a fun and creative way to express your artistic side! Here are some tips to help you get started:
1. Start by gathering your supplies. You’ll need a variety of beads in different sizes and colors, as well as some wire or thread to string them together.
2. Get inspired! Look at pictures of lizards online or in books to get ideas for your design.
3. Sketch out your design on paper. This will help you visualize what your lizard will look like and make it easier to plan out the bead placement.
4. Begin stringing the beads together. Start with the head and work your way down the body.
5. Add details like eyes, claws, and a tail. You can use smaller beads for these details or even create them out of wire.
6. Have fun with it! Don’t be afraid to experiment with different colors and patterns.
Creating a beaded lizard with a unique design is a great way to express your creativity. With these tips, you’ll be able to create a one-of-a-kind lizard that you can be proud of!
Creative Ideas for Decorating Your Beaded Lizard
1. Hang your beaded lizard from the ceiling with colorful ribbons. This will create a fun and whimsical look in your home.
2. Create a beaded lizard wall hanging. Use a variety of colors and sizes of beads to create a unique and eye-catching piece of art.
3. Place your beaded lizard on a shelf or mantel. This will add a touch of color and texture to your room.
4. Make a beaded lizard necklace. This is a great way to show off your beaded lizard and add a bit of fun to your outfit.
5. Create a beaded lizard mobile. Hang your beaded lizard from a branch or other structure and add other colorful beads and decorations to create a unique and beautiful mobile.
6. Use your beaded lizard to decorate a lampshade. This will add a bit of color and texture to your room.
7. Make a beaded lizard keychain. This is a great way to show off your beaded lizard and keep your keys organized.
8. Create a beaded lizard bookmark. This is a great way to add a bit of color and texture to your books.
9. Make a beaded lizard suncatcher. Hang your beaded lizard in a window and let the light shine through to create a beautiful and unique piece of art.
10. Use your beaded lizard to decorate a picture frame. This will add a bit of color and texture to your photos.
How to Make a Beaded Lizard with a Detailed Pattern
Are you ready to make a beaded lizard that will be the envy of all your friends? With this detailed pattern, you can create a colorful and unique lizard that will be sure to turn heads!
First, you will need to gather your supplies. You will need a variety of beads in different colors, a beading needle, beading thread, and scissors. Once you have all of your supplies, you can begin!

Continue stringing the beads until you have completed the pattern. When you are finished, tie off the thread at the end of the last row. Now, you have the body of your beaded lizard!
Next, you will need to create the legs and tail. To do this, thread your needle with a new piece of beading thread and string the beads in the pattern shown in the diagram. When you are finished, tie off the thread at the end of the last row.
Finally, you will need to attach the legs and tail to the body of the lizard. To do this, thread your needle with a new piece of beading thread and stitch the legs and tail onto the body. Make sure to tie off the thread securely when you are finished.
And there you have it! Your beaded lizard is complete! With its colorful pattern and unique design, it is sure to be a conversation starter. Enjoy your new creation!
Q&A
1. What materials do I need to make a beaded lizard?
You will need a variety of beads, a beading needle, beading thread, and scissors.
2. How do I start making a beaded lizard?
Start by threading your needle with the beading thread and tying a knot at the end. Then, string the beads onto the thread in the pattern you want for your lizard.
3. How do I shape the beaded lizard?
Once you have strung the beads onto the thread, you can shape the lizard by manipulating the thread and beads.
4. How do I attach the legs and tail?
To attach the legs and tail, you will need to use a separate piece of thread and needle. Thread the beads onto the thread and then attach them to the body of the lizard.
5. How do I finish the beaded lizard?
Once you have attached the legs and tail, you can finish the lizard by tying a knot at the end of the thread and trimming the excess thread.
Conclusion
Making beaded lizards is a fun and creative way to express yourself. With a few simple supplies and a bit of patience, you can create a unique and beautiful piece of art. Start by gathering the necessary supplies, such as beads, wire, and tools. Then, use the wire to create the basic shape of the lizard. Finally, add the beads to the wire to create the details of the lizard. With a little practice, you can make beaded lizards of all shapes and sizes.