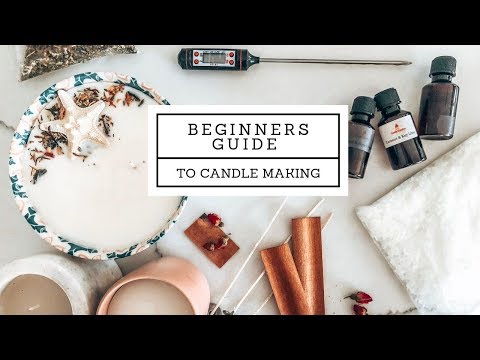
Welcome to the Complete Guide to Candle Making! Whether you’re a beginner or an experienced candle maker, this guide will provide you with all the information you need to make beautiful, high-quality candles. We’ll cover everything from the basics of candle making to more advanced techniques, such as scent blending and color mixing.
We’ll also discuss the different types of waxes, wicks, and containers available, as well as the tools and supplies you’ll need to get started. So, let’s get started and learn how to make your own candles!
Step-by-Step Guide to Making Your Own Candles
I’ve always loved the warm, cozy glow of candles. There’s something so soothing about watching the flickering flame dance in the room. Recently, I decided I wanted to try making my own candles at home. After doing some research, I realized it’s actually a really satisfying and creative process. Here’s a step-by-step guide on how you can make your own customized candles too:
Gather Your Supplies
The first thing you’ll need are the basic candle-making materials – wax, wicks, and containers. I went with soy wax, which is a popular eco-friendly option. You’ll also need wick clips or holders to keep the wick centered, and jars or tins to pour the wax into. Feel free to get creative with the container shapes and sizes.
Prepare the Wicks
Once you have all your supplies, start by trimming the wicks to the right length. The wick should be about 1-1.5 inches taller than the container you’re using. Secure the wick in place using the wick clip or holder.
Melt the Wax
Next, it’s time to melt the wax. I used a double boiler method by placing the wax in a heat-safe container over a pot of simmering water. Gently heat the wax, stirring occasionally, until it’s fully melted and liquid. Be careful not to let the water boil – you don’t want the wax to overheat.
Add Scents and Colors (Optional)
If you want to customize the look and smell of your candle, now is the time to add any essential oils or candle dyes. Start with just a few drops and mix thoroughly. The scent and color will be stronger once the wax hardens.
Pour the Wax
Carefully pour the melted wax into your prepared containers, making sure to keep the wick centered. Leave about 1/2 inch of space at the top for the wax to expand as it cools.
Let It Cool
Now comes the hardest part – waiting! Let the candles sit undisturbed for several hours, or even overnight, to fully harden. Resist the urge to touch them until they’re completely set.
Trim the Wick
Once the wax has hardened, use scissors to trim the wick down to 1/4 inch. This will help the candle burn evenly and safely.
And there you have it – your very own homemade candles! I love how I was able to personalize the scents and colors. It’s such a fun and rewarding DIY project. Give it a try yourself and let me know how it goes!
Essential Supplies for Candle Making
Candle making is a fun and creative way to express yourself and make beautiful decorations for your home. To get started, you’ll need some essential supplies. Here’s a list of what you’ll need to get started:
- Wax: This is the main ingredient in candle making. You can choose from a variety of waxes, such as soy, beeswax, paraffin, and more.
- Wicks: These are the strings that will hold the flame in the candle. You can find pre-made wicks or make your own.
- Containers: You’ll need something to hold the wax and wick. You can use mason jars, teacups, or any other container that can withstand heat.
- Fragrance: This is optional, but adding a scent to your candle can make it even more special. You can find essential oils, fragrance oils, and more.
- Dyes: If you want to add color to your candle, you’ll need some dyes. You can find dyes specifically made for candles, or you can use food coloring.
- Thermometer: This is an important tool for measuring the temperature of the wax. You’ll need to make sure the wax is at the right temperature before pouring it into the container.
- Pouring Pot: This is a pot specifically designed for melting wax. It’s important to use a pouring pot that is made of heat-resistant material.
- Stirring Stick: You’ll need something to stir the wax while it’s melting. A wooden spoon or chopstick works great.
- Safety Equipment: It’s important to wear safety glasses and gloves when working with hot wax.
Now that you have all the supplies you need, you’re ready to start making candles! Have fun and be creative!
How to Choose the Right Wax for Your Candles
When it comes to making candles, the wax you choose is just as important as the wick and the scent. With so many different types of wax available, it can be hard to know which one is right for you. Here are some tips to help you choose the perfect wax for your candles.
First, consider the type of candle you’re making. Different waxes are better suited for different types of candles. For example, if you’re making a container candle, you’ll want to use a wax that has a higher melting point so it won’t melt too quickly. On the other hand, if you’re making a pillar candle, you’ll want to use a wax that has a lower melting point so it will burn evenly.

Finally, consider the scent you want your candle to have. Different waxes can hold different amounts of fragrance, so you’ll want to choose a wax that can hold the amount of scent you want. For example, soy wax can hold up to 10% fragrance, while beeswax can only hold up to 5%.
Choosing the right wax for your candles doesn’t have to be a daunting task. With a little bit of research and experimentation, you can find the perfect wax for your candles. So don’t be afraid to get creative and have fun with it!
Tips for Creating Unique Candle Designs
- Get creative with colors! Mix and match different shades to create a unique look.
- Try using different shapes and sizes of candles to create a unique design.
- Add texture to your candles by using different materials such as wax, glitter, and beads.
- Use stencils to create intricate patterns on your candles.
- Experiment with different scents to create a unique aroma.
- Add a personal touch to your candles by adding a special message or quote.
- Use different wicks to create a unique burning pattern.
- Try using different waxes such as soy, beeswax, or paraffin to create a unique look.
- Add a special touch to your candles by adding a decorative ribbon or bow.
- Get creative with your packaging! Use unique boxes or bags to make your candles stand out.

Troubleshooting Common Candle Making Problems
Candle making is a fun and creative activity that can be enjoyed by people of all ages. However, it can be a bit tricky to get the hang of it. If you’re having trouble with your candle making, don’t worry! Here are some tips to help you troubleshoot the most common candle making problems.
- Wax not melting properly: If your wax isn’t melting properly, it could be because it’s too cold. Make sure you’re melting your wax in a double boiler or a slow cooker set to low heat.
- Wax not pouring properly: If your wax isn’t pouring properly, it could be because it’s too thick. Try adding a few drops of vegetable oil to thin it out.
- Wick not staying lit: If your wick isn’t staying lit, it could be because it’s too short. Make sure your wick is at least 1/4 inch above the wax.
- Candle not burning evenly: If your candle isn’t burning evenly, it could be because the wick is too large. Try using a smaller wick.
- Candle not burning long enough: If your candle isn’t burning long enough, it could be because the wax is too soft. Try using a harder wax or adding a bit of stearic acid to the wax.
With these tips, you should be able to troubleshoot any candle making problems you may have. Have fun and happy candle making!
Q&A
1. What materials are needed to make a candle?
A: To make a candle, you will need wax, a wick, a container, a thermometer, a double boiler, and a stirring tool.
2. What type of wax is best for making candles?
A: The best type of wax for making candles is paraffin wax, as it is easy to work with and has a good scent throw.
3. How do you make a scented candle?
A: To make a scented candle, you will need to add a candle fragrance oil to the melted wax before pouring it into the container.
4. How long does it take to make a candle?
A: The time it takes to make a candle will depend on the type of candle you are making and the complexity of the design. Generally, it takes about an hour to make a basic candle.
5. What is the best way to store candles?
A: The best way to store candles is in a cool, dry place away from direct sunlight. Candles should also be stored in an airtight container to prevent them from absorbing moisture or odors.

Conclusion
In conclusion, candle making is a fun and rewarding hobby that can be enjoyed by people of all ages. With the right supplies and a little bit of patience, anyone can make beautiful and unique candles. With the help of this complete guide to candle making, you can now confidently create your own candles and enjoy the process of creating something special.