Plaster is a versatile material that has been used for centuries in the art of carving. It is a great choice for sculptors, carvers, and other artists who want to create intricate and detailed works of art. Plaster is easy to work with, and it can be used to create a variety of shapes and textures. It is also relatively inexpensive and can be found in most art supply stores. With the right tools and techniques, plaster can be used to create beautiful and unique sculptures.
How to Choose the Right Plaster for Carving
When it comes to carving, the right plaster can make all the difference! Whether you’re a beginner or a seasoned pro, choosing the right plaster for your project can be a daunting task. But don’t worry – with a few simple tips, you’ll be able to find the perfect plaster for your carving needs.
First, consider the type of project you’re working on. Different plasters are better suited for different types of projects. For example, if you’re carving a detailed sculpture, you’ll want to use a plaster that is strong and durable. On the other hand, if you’re creating a simple relief, you may want to opt for a softer plaster that is easier to work with.

Next, think about the finish you’d like to achieve. Different plasters can produce different finishes, so it’s important to choose the right one for your project. For example, if you’re looking for a smooth, glossy finish, you’ll want to use a plaster that is designed for that purpose.
Finally, consider the cost. Plaster can range in price from very affordable to quite expensive, so it’s important to find a plaster that fits your budget. Don’t be afraid to shop around and compare prices – you may be surprised at the deals you can find!
With these tips in mind, you’ll be able to find the perfect plaster for your carving project. So don’t be intimidated – get out there and start carving!
Step-by-step guide
Today, I want to share with you a step-by-step guide on how to carve a stunning plaster relief from Plaster of Paris. This powder-based material, when mixed with water, hardens like cement, making it an ideal choice for relief-carving projects. Let’s get crafty and create beautiful finished pieces with minimal tools needed.
Materials You’ll Need:
- Plaster of Paris
- Flat chisel
- Water
- Tracing chisel (small)
- Pencil
- Sandpaper
- Metal baking pan
- Acrylic paint
- X-ACTO knife
- Paintbrush
- Small, lightweight hammer
- Clear gloss
- Step 1: Acquiring Plaster of Paris To begin our journey into relief carving, head to a hobby or craft shop to purchase Plaster of Paris. Follow the instructions on the package to mix it properly. Typically, the ratio is one part water to two parts Plaster of Paris. Remember, adding too much water can cause the plaster to crack, so measure carefully.
- Step 2: Pouring the Plaster into the Mold Take a metal baking pan, measuring 6-by-9 inches with a depth of at least 6 inches. This will provide ample room for the relief effect of your design. Alternatively, use a round baking pan if you prefer a circular carving. Smooth the plaster flat using a knife or ruler and allow it to dry for several hours, preferably overnight, before moving on to the next step.
- Step 3: Removing the Plaster from the Mold Once the plaster has dried and set, carefully remove it from the mold. Slide a knife around the edges to loosen it, then place your hand on the top surface and turn the mold upside down. Gently shake the plaster piece from the mold and place it on a sturdy, flat work surface, ready for the carving process.
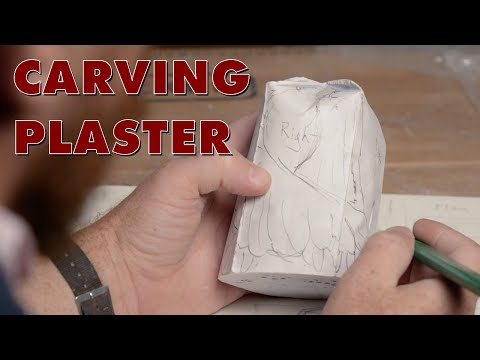
- Step 4: Drawing Your Design Now comes the creative part! Use a pencil to draw your design onto the plaster surface. If you’re not confident in your freehand drawing skills, you can find plenty of stencil designs available at hobby and craft stores.
- Step 5: Carving the Relief Take a flat chisel and start removing the plaster from around the outside of your design. This technique will cause the design itself to rise in relief from the background. Depending on the effect you want to achieve, you can carve low for a bas-relief or dig deeper into the plaster for a high-relief design. For intricate details, switch to an X-ACTO knife with a small, sharp tip. Hobby stores offer sets of various-sized chisels that might come in handy as well.
- Step 6: Refining and Preparing for Painting To give your design a smooth finish, carefully sand it using light-grit sandpaper. Be sure to brush away any excess plaster dust before moving on to the painting step. Use acrylic paints to add color to your relief design. Once the paint has dried, apply a spray gloss coating to give it a beautiful shiny finish.
Tip: Starting with Simple Designs If you’re new to relief carving, begin with a design that doesn’t require cutting away too many small details. The goal of relief carving is to remove extraneous background plaster, allowing your design to stand out from the plaster background. As you gain more experience, you can explore more intricate and complex designs.
Now you have the know-how to create stunning plaster reliefs from Plaster of Paris. So, gather your materials, let your creativity flow, and enjoy the rewarding process of relief carving.
Tips for Carving Plaster with Precision
Carving plaster with precision can be a tricky task, but with the right tools and techniques, you can create beautiful works of art! Here are some tips to help you get started:
- Start with the right tools. Invest in a good quality set of carving tools, such as chisels, gouges, and rasps. Make sure they are sharp and in good condition.
- Use a steady hand. When carving plaster, it’s important to keep your hand steady and your movements precise. Take your time and focus on each cut.
- Use a template. If you’re carving a complex design, it can be helpful to use a template. This will help you keep your lines straight and your design consistent.
- Take breaks. Carving plaster can be tiring, so make sure to take breaks when needed. This will help you stay focused and avoid mistakes.
- Have fun! Carving plaster can be a fun and rewarding experience. Enjoy the process and don’t be afraid to experiment with different techniques.
With these tips, you’ll be carving plaster with precision in no time! Have fun and happy carving!
The Benefits of Carving Plaster for Art Projects
Carving plaster for art projects is a great way to express your creativity and bring your ideas to life. Whether you’re a beginner or a professional artist, plaster carving can be a fun and rewarding experience. Here are some of the benefits of carving plaster for art projects:
- Versatility: Plaster is a very versatile material that can be used for a variety of art projects. You can use it to create sculptures, reliefs, and even masks. It’s also easy to shape and carve, so you can create intricate designs with ease.
- Durability: Plaster is a very durable material that can withstand wear and tear. This makes it ideal for outdoor projects, as it won’t be affected by the elements.
- Cost-Effective: Plaster is a relatively inexpensive material, so it’s a great option for those on a budget. You can get a lot of bang for your buck when it comes to plaster carving.
- Fun: Carving plaster is a great way to have fun and express your creativity. It’s a great activity for both adults and children alike.
Carving plaster for art projects is a great way to bring your ideas to life. With its versatility, durability, cost-effectiveness, and fun factor, it’s no wonder why so many people are turning to plaster carving for their art projects. So why not give it a try? You’ll be glad you did!
Creative Ideas
- Create a 3D relief of your favorite animal or landscape. Use a variety of tools to carve out the details and bring your design to life.
- Create a unique wall hanging by carving a plaster relief of your favorite quote or saying.
- Create a plaster sculpture of your favorite character or object. Use a variety of tools to carve out the details and bring your design to life.
- Create a plaster mask of your favorite animal or character. Use a variety of tools to carve out the details and bring your design to life.
- Create a plaster relief of your favorite flower or plant. Use a variety of tools to carve out the details and bring your design to life.
- Create a plaster relief of your favorite constellation or star pattern. Use a variety of tools to carve out the details and bring your design to life.
- Create a plaster relief of your favorite city skyline. Use a variety of tools to carve out the details and bring your design to life.
- Create a plaster relief of your favorite abstract design. Use a variety of tools to carve out the details and bring your design to life.
- Create a plaster relief of your favorite sports team logo. Use a variety of tools to carve out the details and bring your design to life.
- Create a plaster relief of your favorite holiday or celebration. Use a variety of tools to carve out the details and bring your design to life.

Conclusion
In conclusion, plaster for carving is an excellent material for creating sculptures and other artworks. It is easy to work with, relatively inexpensive, and can be used to create intricate and detailed designs. Plaster is also durable and can last for many years if properly cared for. With the right tools and techniques, plaster can be used to create beautiful and unique works of art.


