
Trace was the one word that confused me for my entire first year of soapmaking, and the batch that finally taught it to me was a swirl I ruined by over-blending. I have been making soap for about eleven years, and I still watch the batter drip off my spatula on every single pour. Trace is less a moment than a range, and learning to read it is what separates a clean swirl from a lumpy mess.
What a ruined swirl taught me about trace
I wanted a delicate feathered swirl, so I kept the stick blender running to be sure the batter was properly mixed. In about ten seconds it went from pourable to thick pudding, and I ended up gloping seized batter into the mold with a spoon. The swirl was gone, the bars came out lumpy, and I learned that with a stick blender you can pass the trace you wanted in a heartbeat.
The lesson was about control. Trace only moves in one direction, toward thicker, and the tools that speed it up are easy to overuse.
Trace is the point where the oils and lye water have emulsified into a stable mixture that will not separate back into layers. It marks that saponification is underway. Before trace you can still see streaks of oil in the batter, and once you reach it, a drizzle of soap leaves a trail on the surface instead of sinking straight in.
Nearly every cold process design decision hangs on trace. When you add color, when you add scent, and when you pour all depend on how thick the batter has grown.
What trace actually is
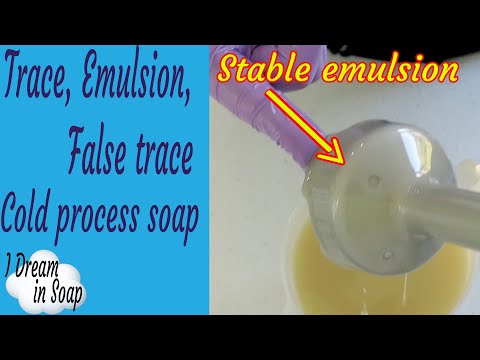
Trace sits on a spectrum, and it helps to think in stages. The earliest stable point is emulsion, where the oil streaks vanish but no trail forms yet, and the batter looks like thin pancake batter. Light trace comes next, leaving a fleeting trail that sinks over a few seconds, with the consistency of thin cake batter.
Medium trace holds a clearer trail that rests before sinking, closer to pudding, and thick trace holds its shape like a heavy pudding. You tell where you are by drizzling batter off a spatula: if the line rests on the surface, you have reached trace, and if oil streaks remain, you have not.
The skill is recognizing these stages and controlling the pace. None of it is hard to learn, though it takes a few batches before your eye trusts what it sees. The trickiest pitfall is false trace, where the batter thickens because cool hard oils are re-solidifying rather than because it has emulsified.
Have you ever chased a delicate swirl only to watch the batter seize into pudding before you could pour? That is acceleration outrunning you, and it usually traces back to the stick blender, the temperature, or the fragrance.
Reading trace matters to anyone making cold process or hot process soap, from the first plain batch to the most intricate design. A single-color bar forgives a heavy hand, while a feathered swirl demands you stop at emulsion or light trace. Compared to melt and pour, where you simply pour melted base, cold process asks you to judge this moving target every time.
Two questions sharpen your eye. Do you know the difference between a true emulsion and a false trace that only looks thick? And are you blending with the stick blender submerged, or whipping air in and misreading the thickness?

Essential materials and tools
Reading and controlling trace comes down to a few tools and knowing how each one moves the batter along.
| Item Category | Specifications |
|---|---|
| Stick blender | Brings a batch to trace in 30 seconds to 2 minutes; pulse in short bursts, keep the head submerged |
| Whisk or spatula | For slow, hand-controlled trace and for stirring in additives without accelerating |
| Thermometer | To soap in the 100 to 130 F range and avoid false trace from cool oils |
| Clear or tall container | To watch the batter thicken and keep the blender fully submerged |
| Pre-dispersed colorants | Mixed and ready before you reach trace, since trace only moves forward |
| Recipe and lye calculator | To anticipate how your oils and water will behave before you mix |
| Timer or notes | To log how fast a recipe traces so you can plan the next batch |
Water is one of your main levers over trace speed, since more water slows the reaction and a higher lye concentration speeds it up. The calculator below returns your water amount for a chosen lye concentration, so you can dial the pace before you start.
Loading calculator...
Key techniques and skills
- Combining lye water and oils with both in the 100 to 130 F range
- Melting all hard oils fully so nothing re-solidifies into false trace
- Pulsing the stick blender in short bursts, then stirring, rather than running it nonstop
- Keeping the blender head submerged and tilted to avoid whipping in air
- Stopping at emulsion for the most working time on intricate swirls
- Recognizing light trace as a thin trail that sinks over a few seconds
- Blending on to medium or thick trace for layers and textured tops
- Adding pre-dispersed colorants at emulsion or light trace
- Adding accelerating fragrance oils last, and being ready to move fast
- Switching to a whisk when a recipe or fragrance is known to accelerate
- Watching for false trace, which looks grainy and thins again with stirring
- Logging how each recipe traces so you can plan the next batch
The rule that saved my designs is simple: you can always blend more, but you can never un-blend. I pulse the stick blender two or three times, stir, and check the drizzle before I decide whether to blend again. Reaching for short bursts and stopping early leaves me room to thicken further, where over-blending leaves me nowhere to go.
Common mistakes and how to avoid them
- Over-blending past the trace you wanted. Cause: running the stick blender too long. Fix: pulse in short bursts and stop at the first sign of the trace you need, since you cannot un-blend.
- Pouring at false trace. Cause: soaping too cool, so hard oils re-solidify. Fix: keep oils fully melted and soap at 100 to 130 F, and if the batter looks grainy, keep stirring until it truly emulsifies.
- A swirl seizes before you pour. Cause: an accelerating fragrance or a high hard-oil recipe. Fix: soap cool, use a whisk, and add the fragrance last.
- Misreading thickness from air bubbles. Cause: the blender head not fully submerged. Fix: keep it submerged and tilted so no air whips in.
- Adding colorant too late. Cause: waiting past a workable trace. Fix: have colorants pre-dispersed and stir them in at emulsion or light trace.
- The batter never seems to trace. Cause: a high olive-oil recipe or too much water. Fix: give it time, use a small water discount near 33 percent concentration, and blend a little more.
False trace is the one that can hurt a bar. It looks thick but grainy, and it comes from soaping too cool, so the oils have cooled and firmed rather than reacted with the lye. Pour at that point and you trap unreacted lye in the mold, which can leave a caustic pocket in the finished bar. If your batter looks lumpy at low temperatures, keep stirring until it smooths into a true emulsion.
Three points anchor everything about trace. Trace is the point where the oils and lye have emulsified and a drizzle of batter leaves a trail that rests on the surface before sinking. You can always blend a batter thicker, but you can never un-blend it, so reach for short bursts and stop early. And false trace looks thick but grainy and comes from soaping too cool, so pouring at that point traps unreacted lye in the bar.
Reading trace for the design you want
Here is how I match trace to a design. For a feathered or intricate swirl, I stop at emulsion, pulsing the blender just until the oil streaks disappear, then switch to a whisk so I have the longest possible working time before it thickens.
For a simple in-the-pot swirl or a single color, light trace is enough, thin like cake batter, fluid enough to pour and move. I add my pre-dispersed colors here and pour before it climbs further.
Once trace clicks, it turns soapmaking from guesswork into control. Knowing exactly how thick I want the batter for a given design, and being able to stop it there, is what lets me plan a swirl or a set of clean layers and actually get what I pictured. That command over the pour is the most satisfying skill I have built.
For layers and textured tops I blend on to medium or thick trace, where the batter holds a shape and sits in defined lines. Embeds and heavy additives want a light trace so they suspend without dragging the batter down too fast.
The honest difficulty is that trace resists description and photographs badly. No blog picture quite captures the way a trail sits and sinks, so the only real teacher is watching your own batter move batch after batch. Beginners struggle here longer than with almost any other part of the craft.
The more batches you pour, the faster your eye reads the drizzle. What felt like a mystery in my first year became the check I do without thinking, dipping the spatula and watching the line rest before I commit to the mold.
Your oil blend decides how fast a recipe traces, since coconut, palm, and butters speed it up while olive slows it down. The calculator below shows how your chosen oils will behave, including their tendency to trace and the hardness of the bar, before you ever mix. Enter your oils to see the profile.
Loading calculator...
Final thoughts
Trace rewards a light hand on the blender and an eye trained by watching your own batter, and it punishes the impatience that runs the stick blender to be safe. Every cold process maker has to learn it, and the fastest way is to pulse, stir, and check the drizzle rather than trust a timer. Soap at 100 to 130 F, keep your colorants ready, and stop at the earliest trace your design allows.
Looking back, I would have put the stick blender down far sooner instead of over-mixing every batch out of nervousness. That one habit would have saved my first swirl and a run of lumpy bars. Blend in short bursts, keep the batter warm enough to avoid false trace, and remember that you can always mix more but never mix less.







