
My first batch of soap papers tore into wet shreds because I kept brushing back over the same spot. I have been making soap for about eleven years, and these thin dissolving sheets are the one I reach for when I am packing a bag rather than filling a soap dish. A finished sheet is barely there, a wafer that vanishes into lather the moment water hits it.
What soap papers taught me about a light touch
That torn first batch was pure heavy-handedness. I loaded the brush, worked the soap back and forth to get an even coat, and the delicate water-soluble paper dissolved and ripped under the second pass. My second try held together, but I stored the finished sheets in a tin in the bathroom and found them fused into a gummy lump within a week.
Both failures came down to respecting the materials. The paper wants a single quick pass, and the finished sheets want to stay bone dry. Neither is obvious until you get it wrong.
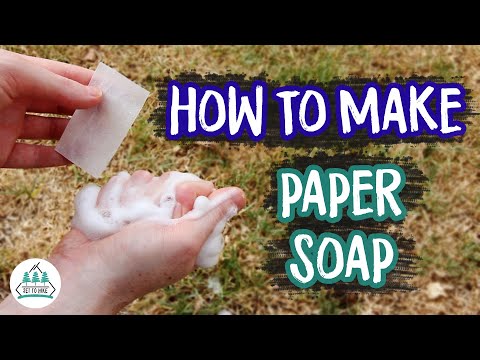
Paper soap is a wafer-thin, single-use sheet that dissolves in water and lathers between your hands. The idea was perfected in mid-twentieth-century Japan, where liquid soap was coated onto water-soluble paper, dried, and cut for hotels and airlines. When water hits a sheet, the paper fibers break apart while the soap does the cleaning.
I make mine by coating liquid soap onto water-soluble paper, which is the simplest route. There is also a melt and pour dip method for a sturdier sheet, and I will cover where it fits.
What this craft really entails
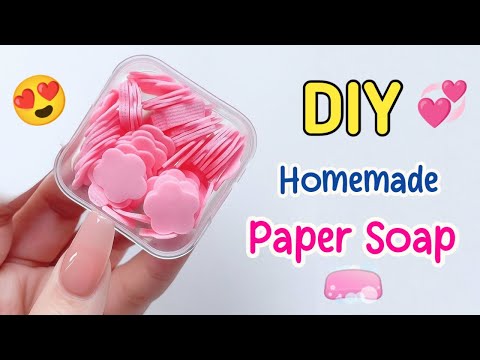
Soap papers are a thin film of soap on a carrier that dissolves. In the coating method, you spread liquid soap thinned with a little water and glycerin onto water-soluble paper, dry it, and cut it into small pieces. In the dip method, you pass plain or printed paper through hot clear melt and pour base for the thinnest possible layer.
The carrier is the key ingredient. Water-soluble PVA paper, sold as a fabric stabilizer or as embed paper from soap suppliers, dissolves in seconds. Rice paper and lightly oiled parchment also work. Ordinary paper never dissolves, so it cannot be used.
The core skills are thinning the soap to the right consistency, spreading it without tearing the paper, and drying the sheets fully before cutting. None of it is difficult, though the paper is delicate and the finished sheets are fussy about moisture.
Have you painted soap onto water-soluble paper only to watch it tear the moment your brush passed twice? That thin PVA sheet dissolves under a wet brush, so it forgives one pass and punishes a second.
Soap papers suit travelers, campers, hikers, and anyone who wants soap without a bottle or a bar. They shine as party favors and small gifts too. Compared to a bar of soap, they trade longevity for portability, since each sheet is a single wash. Compared to a bottle of liquid soap, they carry no plastic and weigh almost nothing.
Two questions save your first batch. Do your finished sheets stay crisp, or do they clump into a sticky wad in a humid bathroom? And are you reaching for water-soluble paper, or trying to use ordinary paper that will never dissolve?
Essential materials and tools
A batch fills a small travel tin with a couple of weeks of single-use sheets. Everything comes from a craft store or a soap supplier.
| Item Category | Specifications |
|---|---|
| Soap base | Liquid castile, hand soap, or body wash for coating; clear glycerin melt and pour for the dip method |
| Water-soluble paper | PVA stabilizer or embed paper that dissolves in water; the carrier for the coating method |
| Glycerin | Keeps sheets flexible and helps them dissolve; a small amount stirred into the soap |
| Water | To thin the soap to a spreadable consistency |
| Fragrance and color | Skin safe essential oil or fragrance, and a drop of soap-safe color |
| Brush or spray bottle | A soft brush to paint the soap, or a fine spray bottle for the spray method |
| Flat non-stick surface | Wax paper, parchment, or a silicone mat to work on |
| Drying and storage | A line with clips or a rack to dry, and an airtight tin for the finished sheets |
The coating is a balance of soap, water, and glycerin, and getting that ratio right is what makes a sheet that spreads cleanly and still dissolves. The calculator below returns your soap-to-liquid amounts for a batch, so the solution is neither too thick to spread nor thin enough to melt the paper.
Loading calculator...
Key techniques and skills
- Choosing water-soluble PVA paper rather than ordinary paper
- Thinning the liquid soap with a little water and glycerin to a spreadable consistency
- Spreading the soap in one quick, even pass to avoid tearing the paper
- Leaving an untouched strip to hang the sheet from while it dries
- Coating the second side only once the first has set
- Air-drying the sheets several hours to overnight before cutting
- Cutting the dried sheets into small single-use pieces
- Using the melt and pour dip method when you want a sturdier sheet
- Keeping the dip base hot but not boiling for the thinnest layer
- Stirring fragrance and a drop of color into the solution before coating
- Storing the finished sheets in an airtight tin away from humidity
- Testing one piece under water to confirm it dissolves and lathers
Leaving a bare strip along one edge is the trick that made drying easy. I coat everything except a strip an inch or two wide, then clip that dry strip to a line so the wet soap never has to touch anything while it sets. The sheet dries flat and clean, where laying a fully coated sheet down glues it to the surface.
Common mistakes and how to avoid them
- The paper tears while coating. Cause: brushing over the same spot twice. Fix: spread in one quick pass and coat the second side only after the first sets.
- Sheets clump into a sticky wad. Cause: glycerin drawing in humidity. Fix: store them in an airtight tin and keep them out of the bathroom.
- The coating dissolves the paper before it dries. Cause: the soap solution is too watery. Fix: thin it only enough to spread, not to a runny liquid.
- The soap will not spread evenly. Cause: the solution is too thick. Fix: add a little water until it brushes on smoothly.
- Sheets never dissolve in use. Cause: ordinary paper used instead of water-soluble. Fix: use PVA stabilizer or embed paper.
- Sheets are brittle and crack. Cause: no glycerin and over-drying. Fix: add a little glycerin to the solution for flexibility.
Humidity is the enemy of a finished sheet. The same glycerin that keeps a soap paper flexible also pulls moisture from the air, so a tin left open in a steamy bathroom turns a stack of crisp sheets into a gummy block. These live in an airtight container, kept somewhere dry.
Three points decide whether your sheets come out crisp and usable. Keep the soap solution thin but not watery, since too thick will not spread and too thin dissolves the paper before it dries. Store finished sheets in an airtight tin, because the glycerin draws moisture and the sheets clump or dissolve in a humid bathroom. And spread the soap in one quick pass and do not go back over a spot, or the delicate water-soluble paper tears.
Coating your first sheets
Here is the routine that finally worked for me. I thin a few tablespoons of liquid castile with a little water and a small spoon of glycerin, stir in a drop of color and a few drops of essential oil, and lay a sheet of water-soluble paper on a silicone mat.
Then I load a soft brush and spread the soap across the sheet in single, unhurried passes, leaving a bare strip along one edge. Working in one direction and never doubling back keeps the paper intact.
The payoff is how little space these take. A tin of soap papers slips into a pocket or a wallet and weighs almost nothing, so I have soap on a hike, in an airport, or at a park where the bathroom ran dry. For travel and camping, a stack of these beats hauling a bottle or a wet bar every time.
Once the first side sets, I clip the dry strip to a line and let the sheet air-dry for several hours, then coat the back and dry it again. When it is completely dry, I cut it into small rectangles and store them in a tin. For a sturdier sheet, I skip the brush and briefly dip paper through hot clear melt and pour base instead.
The honest drawback is that this is fiddly work for a delicate product. The paper tears easily, the sheets take hours to dry, and they demand airtight storage forever after. Anyone expecting the quick satisfaction of a poured bar will find soap papers a patient, hands-on project by comparison.
The finished sheets tell you whether your solution was right. A piece that dissolves cleanly under the tap and lathers between your hands means the balance of soap, water, and glycerin landed where it needed to.
The cost calculator below folds your soap, paper, glycerin, and fragrance together and divides across the batch to show what each sheet or tin costs, useful if you are making travel gifts or party favors. Enter your batch spend and the number of sheets for the per-piece figure.
Loading calculator...
Final thoughts
Soap papers reward a light hand and airtight storage, and they punish a heavy brush and a humid shelf. Anyone can make them with liquid soap and water-soluble paper, and the melt and pour dip is the better route for a sturdier sheet. Start with a small batch, use real water-soluble paper, and add a little glycerin so the sheets stay flexible.
Looking back, I would have spread that first batch in single passes and stored the results in a sealed tin from the start, instead of shredding the paper and then letting humidity ruin what survived. Thin the soap just enough to spread, coat in one direction, and keep every finished sheet dry and sealed until you need it.








For the soap sheets to really stand out, I love playing with high-contrast color palettes. Try using a deep charcoal mineral pigment against a crisp white PVA sheet for a modern, architectural look. If you want something softer, a pastel lavender liquid castile with a hint of gold mica creates a beautiful, shimmering effect as the soap dissolves. The key is keeping the saturation high enough so the color is visible on the thin film, but thin enough to maintain transparency. Pairing these with monochromatic ribbons makes for lovely, minimalist party favors that look expensive.
Regarding your suggestions on pigments, using high-saturation colorants is indeed effective for aesthetics, but keep in mind that mineral pigments like charcoal or mica can settle in the liquid soap if it is too thin. When thinning your base with water and glycerin, use a high-shear mixer or whisk thoroughly to ensure the mica particles are suspended evenly before application. If you notice the color streaking on the PVA paper, you may be using too much glycerin, which increases the drying time and can lead to uneven pigment concentration. A drop of liquid dye works more reliably for transparent results compared to powder pigments, which occasionally leave a slight residue on the skin after the sheet fully dissolves.
That makes sense, I actually had some settling issues with a batch of blue mica. Should I reduce the glycerin percentage to help the pigment stay in suspension?
Reducing glycerin might help with pigment suspension, but it also increases the risk of the finished sheets becoming brittle and cracking once they are fully dried. Instead of cutting the glycerin, try adding a tiny amount of a suspending agent like Xanthan gum to your liquid soap base before adding the color. This creates a thicker carrier fluid that holds heavier mica particles in place while the sheets air dry. If you stick with the current glycerin amount, simply stirring the mixture gently between every few brush strokes on the PVA paper will also prevent the mica from pooling at the bottom of your container.