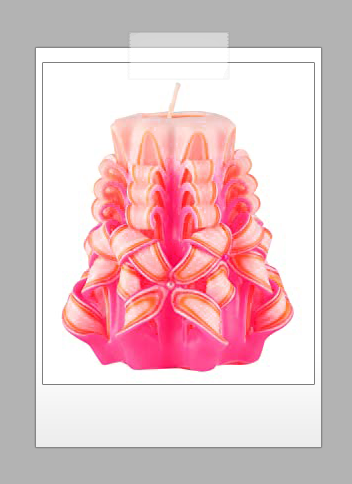
Carving Christmas candles is a wonderful way to add a personal touch to your holiday decorations. This traditional craft allows you to create intricate designs that can become cherished heirlooms. In this article, we’ll guide you through the process of carving Christmas candles, from choosing the right candle to mastering carving techniques and finishing your masterpiece. So, how to carve Christmas candles?
Choosing the Right Candle
- Size. When selecting a candle to carve, consider its size. Larger candles provide more surface area for your design, making them easier to work with, especially for beginners. Smaller candles, on the other hand, require more precision and may be better suited for more experienced carvers.
- Material. The material of your candle also plays an essential role in carving. Paraffin wax is the most common and easiest to work with due to its softness and flexibility. Beeswax is another option, but it’s harder and requires more skill to carve.
Essential Tools for Candle Carving
To start carving Christmas candles, you’ll need some basic tools:
- A carving knife or a small paring knife
- A set of wood carving tools or clay sculpting tools
- A ruler or measuring tape
- A pencil or wax pen for sketching your design
- A soft cloth for wiping away wax debris

Basic Candle Carving Techniques
Here are the basic techniques:
Whittling
Whittling is the process of gradually shaving away layers of wax to create your design. This technique is excellent for creating simple, linear patterns or more complex designs with multiple layers.
Layering
Layering involves cutting through the outer layer of colored wax to reveal a contrasting color beneath. This technique adds depth and dimension to your design and is especially effective when used with two or more colors of wax.
Sculpting
Sculpting is the most advanced technique, requiring a steady hand and an artistic eye. This method involves shaping the wax into three-dimensional forms, such as flowers, leaves, or other festive elements.
Preparing Your Workspace
Before you begin carving, set up a clean, well-lit workspace with all your tools within reach. Lay out a protective covering, like a plastic tablecloth or a sheet of wax paper, to catch any wax shavings.
Step-by-Step Guide to Carving Christmas Candles
- Step 1: Plan Your Design. Sketch out your design on paper before you start carving. Consider the size and shape of your candle, as well as any themes or motifs you’d like to incorporate. Once you’re happy with your design, transfer it onto the candle using a pencil or wax pen.
- Step 2: Prepare the Candle. To make carving easier, soften the candle by placing it in a warm area for a short time. This will make the wax more pliable and less prone to cracking. Be careful not to overheat the candle, as this may cause it to lose its shape.
- Step 3: Start Carving. Begin carving your design by carefully following the lines you’ve drawn on the candle. Use the whittling technique for simpler designs, and layering or sculpting for more complex patterns. Take your time and work slowly, removing small amounts of wax at a time.
- Step 4: Add Details. Once you’ve completed the main part of your design, add any finer details using the smaller carving tools. This is the stage where you can get creative with textures, patterns, and other intricate elements.
- Step 5: Finishing Touches. After carving your design, clean up any rough edges or wax debris with a soft cloth. If desired, add embellishments like glitter, ribbon, or beads to enhance your creation.
Candle Carving Safety Tips
- Always carve away from your body to prevent accidents.
- Keep your tools sharp; dull tools require more force and can lead to accidents.
- Work in a well-lit area to ensure you can see your work clearly.
- Take breaks if you feel tired or if your hand starts to cramp. This will help prevent mistakes and injuries.
- Keep children and pets away from your workspace to avoid distractions and accidents.
Storing and Displaying Your Carved Christmas Candles
To store your carved candles, wrap them in tissue paper or bubble wrap to prevent damage. Store them in a cool, dry place away from direct sunlight to avoid melting or discoloration.
When displaying your candles, place them on a heat-resistant surface or a decorative candle holder. Keep them away from drafts, flammable materials, and high-traffic areas to ensure they remain safe and beautiful throughout the holiday season.
Conclusion
Carving Christmas candles is a delightful way to personalize your holiday décor and create lasting memories. With practice and patience, you can master the art of candle carving and impress your friends and family with your unique creations. Just remember to follow safety precautions and enjoy the process.
