Apple carving is an ancient art form that has been practiced for centuries. It is a craft that involves carving intricate designs into apples to create beautiful and unique pieces of art. Apple carving is a great way to express creativity and can be used to create decorations, gifts, and even sculptures. It is a fun and rewarding activity that can be enjoyed by people of all ages. With the right tools and a bit of practice, anyone can learn how to carve apples and create beautiful works of art.
- The History of Apple Carving
- Creative Ideas for Apple Carving
- Tips for Carving Apples with Kids
- How to Carve an Apple for Halloween
- The Best Tools for Apple Carving
- How to Make an Apple Carving Last Longer
- Apple Carving Techniques for Beginners
- Apple Carving Projects for the Holidays
- Apple Carving Ideas for Weddings
- Apple Carving as a Stress-Relieving Activity
- Q&A
- Conclusion
The History of Apple Carving
Apple carving is an ancient art form that has been practiced for centuries. It is believed to have originated in China, where it was used to decorate the homes of the wealthy and powerful. Over time, the art of apple carving spread to other parts of the world, including Europe and the United States.

The first step is to choose the right apple. You want to pick one that is firm and ripe. Once you have your apple, you can begin carving. Start by cutting off the top and bottom of the apple. Then, use your knife to carve out the core and seeds.
Next, you can start to create your design. You can carve out shapes, patterns, or even words. You can also use a variety of tools to create more intricate designs. Once you have finished carving, you can use a brush to paint your design with food coloring or edible paint.
Apple carving is a great way to express yourself and make something beautiful. It is a fun and creative activity that anyone can enjoy. So why not give it a try? You never know what amazing creations you can make!
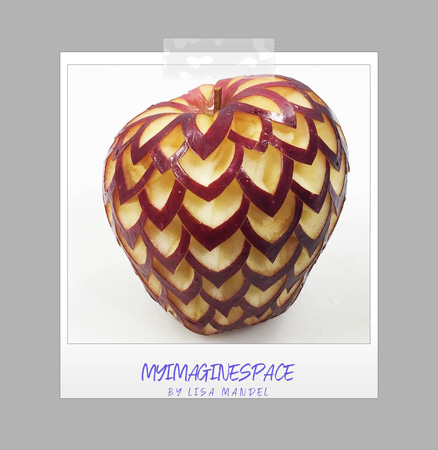
Creative Ideas for Apple Carving
- Apple Swan: Create a beautiful swan out of an apple by cutting the top off and hollowing out the inside. Then, cut the sides of the apple to create the swan’s wings and neck. Finally, use a knife to carve out the details of the swan’s head and beak.
- Apple Owl: Transform an apple into an owl by cutting the top off and hollowing out the inside. Then, cut the sides of the apple to create the owl’s wings and ears. Finally, use a knife to carve out the details of the owl’s eyes and beak.
- Apple Butterfly: Create a beautiful butterfly out of an apple by cutting the top off and hollowing out the inside. Then, cut the sides of the apple to create the butterfly’s wings. Finally, use a knife to carve out the details of the butterfly’s body and antennae.
- Apple Flower: Transform an apple into a flower by cutting the top off and hollowing out the inside. Then, cut the sides of the apple to create the petals of the flower. Finally, use a knife to carve out the details of the flower’s center and stem.
- Apple Tree: Create a beautiful tree out of an apple by cutting the top off and hollowing out the inside. Then, cut the sides of the apple to create the tree’s branches. Finally, use a knife to carve out the details of the tree’s leaves and trunk.
Tips for Carving Apples with Kids
- Start by selecting the perfect apple! Choose one that is firm and ripe.
- Cut the apple in half. Let the kids use a butter knife to help with this step.
- Use a spoon to scoop out the core and seeds.
- Let the kids get creative! Have them use a paring knife to carve shapes, faces, or designs into the apple.
- Once they’re done, sprinkle the apples with cinnamon and sugar for a sweet treat.
- Enjoy your delicious creations!
How to Carve an Apple for Halloween
It’s Halloween time, and that means it’s time to get creative with your decorations! One of the most fun and festive decorations you can make is a carved apple. It’s easy to do and looks great on your Halloween table. Here’s how to carve an apple for Halloween:
- Start by washing your apple and drying it off.
- Cut off the top of the apple and scoop out the core and seeds.
- Use a sharp knife to carve a face into the apple. You can make it as spooky or as silly as you like!
- Place a tea light candle inside the apple and light it.
- Place your carved apple on your Halloween table and enjoy the festive glow!
Carving an apple for Halloween is a fun and easy way to add some extra spookiness to your decorations. Have fun and get creative with your design!
The Best Tools for Apple Carving
Apple carving is a fun and creative way to make beautiful decorations for your home or to give as gifts. With the right tools, you can create intricate designs that will impress your friends and family. Here are some of the best tools for apple carving:
- Apple Corer: An apple corer is a must-have tool for apple carving. It makes it easy to remove the core and seeds from the apple, so you can start carving right away.
- Apple Peeler: An apple peeler is a great tool for removing the skin from the apple. This will make it easier to carve intricate designs.
- Carving Knife: A carving knife is essential for creating detailed designs. Look for a knife with a sharp, thin blade that will make it easier to carve intricate shapes.
- Apple Slicer: An apple slicer is a great tool for creating thin slices of apple. This will make it easier to create thin, delicate designs.
- Apple Scoop: An apple scoop is a great tool for removing the flesh from the apple. This will make it easier to create hollowed-out designs.
With these tools, you’ll be able to create beautiful apple carvings that will impress your friends and family. So get carving and have fun!
How to Make an Apple Carving Last Longer
If you’ve ever carved an apple, you know how quickly it can start to look a little sad. But don’t worry – there are some simple steps you can take to make sure your apple carving lasts longer!
First, make sure you’re using a sharp knife. A dull knife can cause the apple to bruise and turn brown quickly.
Second, keep your apple in a cool, dry place. Heat and humidity can cause the apple to spoil faster.
Third, brush the apple with a thin layer of lemon juice. This will help keep the apple from turning brown.
Fourth, if you’re not going to eat the apple right away, wrap it in plastic wrap or put it in an airtight container. This will help keep the apple from drying out.
Finally, if you want to display your apple carving, consider using a clear sealant. This will help protect the apple from moisture and keep it looking fresh for longer.
With these simple steps, you can make sure your apple carving lasts longer and looks great!
Apple Carving Techniques for Beginners
Are you ready to get creative with your apples? Carving apples is a fun and easy way to make beautiful decorations for your home or to give as gifts. Here are some tips and techniques to get you started!
- Choose the right apple. Look for apples that are firm and free of blemishes. The size and shape of the apple will determine the type of design you can create.
- Prepare the apple. Cut the apple in half and remove the core. Use a sharp knife to carve away the skin and flesh to create your design.
- Get creative. Use your imagination to create a unique design. You can carve simple shapes like hearts or stars, or more intricate designs like flowers or animals.
- Use the right tools. A sharp knife is essential for carving apples. You can also use a vegetable peeler, a melon baller, or a small spoon to create different textures and shapes.
- Add color. Once you’ve finished carving your design, you can add color with food coloring or paint.
Carving apples is a fun and creative way to make beautiful decorations. With a little practice, you’ll be creating amazing apple carvings in no time!
Apple Carving Projects for the Holidays
Apple Carving Projects for the Holidays
The holidays are a time for family, friends, and fun! And what better way to get into the festive spirit than with some creative apple carving projects? Whether you’re looking for a fun activity to do with the kids or a unique way to decorate your home, these apple carving projects are sure to bring a smile to everyone’s face.
Start by gathering your supplies. You’ll need a few apples, a sharp knife, and some toothpicks. You can also use a vegetable peeler to make the job easier. Once you have your supplies, it’s time to get creative!
Another fun project is to create a snowman. Start by cutting the apple in half and then use a knife to carve out a snowman shape. You can then use toothpicks to attach small decorations such as a carrot nose, buttons, and a scarf.
Finally, you can create a festive holiday tree. Start by cutting the apple in half and then use a knife to carve out a tree shape. You can then use toothpicks to attach small decorations such as stars, ornaments, and garland.
These apple carving projects are sure to bring a smile to everyone’s face this holiday season. So grab your supplies and get creative!
Apple Carving Ideas for Weddings
- Apple Blossom Bouquet: Create a beautiful bouquet of apple blossoms for the bride and groom to carry down the aisle. Carve the apples into delicate petals and arrange them in a bouquet for a unique and romantic touch.
- Apple Lovebirds: Carve two apples into the shape of lovebirds and place them on the wedding cake. This is a sweet and romantic way to show the couple’s love for each other.
- 3. Apple Place Cards: Carve each guest’s name into an apple and place it at their seat. This is a fun and creative way to show your guests how much you appreciate them.
- 4. Apple Table Decorations: Carve apples into various shapes and sizes and place them around the reception area. This is a great way to add a unique touch to your wedding decor.
- 5. Apple Favors: Carve apples into small shapes and package them as favors for your guests. This is a great way to thank your guests for attending your special day.
Apple Carving as a Stress-Relieving Activity
Apple carving is a fun and creative way to relieve stress! Whether you’re a beginner or an experienced carver, this activity is sure to bring a smile to your face.
Start by selecting the perfect apple. Choose one that is firm and ripe, and make sure it’s free of blemishes. Once you’ve chosen your apple, it’s time to get creative! Use a sharp knife to carve out shapes, faces, or whatever your imagination can come up with. You can even use a toothpick to add details.
As you carve, take your time and focus on the task at hand. Feel the apple in your hands and the knife in your fingers. Notice the texture of the apple and the sound of the knife as it cuts through the skin. This mindful approach will help you to relax and enjoy the process.
When you’re finished, admire your work and take a moment to appreciate your creativity. You can even take a picture of your masterpiece and share it with friends and family.
Apple carving is a great way to express yourself and relieve stress. So grab an apple and get carving!
Q&A
Conclusion
Apple carving is a fun and creative way to express yourself and make something beautiful. It can be a great way to spend time with family and friends, or to make a unique gift for someone special. With a few simple tools and some practice, anyone can create amazing works of art from apples. Whether you are a beginner or an experienced carver, apple carving is a great way to express your creativity and make something unique.