The first acrylic portrait I finished looked stiff until I stopped chasing perfect skin color on the first pass and began building values and temperature in clear stages. That shift from single-layer guessing to deliberate steps produced far more convincing faces.
Clear steps I follow to paint a portrait in acrylic
Painting a portrait in acrylic works best as a sequence: accurate drawing, value underpainting, blocked-in local color, refined form with warm and cool skin tones, and final details. Acrylic’s fast drying encourages thin layers and corrections rather than prolonged blending. A limited palette and consistent lighting on the reference keep the process manageable.
Early attempts that jumped straight to finished color often lost proportion and value structure. Once I locked the drawing and established lights and darks first, the subsequent color layers sat more confidently on the form.
A reliable acrylic portrait sequence is structure drawing, thin value underpainting, local color block-in, layered skin-tone modeling, and selective detail.
The same order scales from quick studies to more finished works.
What this craft really entails
Painting a portrait in acrylic means translating a three-dimensional head into flat layers of value and color while the paint sets quickly. The process begins with proportion and placement, moves through a monochromatic or limited-color underpainting that maps light and shadow, then builds skin with mixtures of warm and cool notes. Edges are softened or sharpened according to the planes of the face, and details such as eyes, lips, and hair are added only after the larger forms read correctly.
Core skills are measuring proportions, mixing consistent skin tones from a small set of pigments, working in thin layers, and evaluating the portrait from a distance. Beginners benefit from a grid or careful freehand drawing and a simple earth-tone underpainting. Intermediate painters refine temperature shifts and edge control. Advanced work introduces more subtle glazing and selective texture.
Compared with oil portraiture, acrylic demands faster decisions and more layering. Compared with direct alla-prima approaches, the stepped method reduces mud and proportion errors.
Have you ever mixed a “perfect” skin color only to watch it look wrong once placed next to the background or hair?
That happens when values and surrounding colors are not yet established. Another common issue is over-blending wet acrylic until the form flattens. A third difficulty appears when details are added before the big shapes of light and shadow are solid.
Avoid finishing facial features before the overall value structure and major planes of the head are correct; early detail often has to be repainted once larger relationships change.
The process suits anyone working from a clear reference photo or life study who wants a repeatable path rather than improvisation alone.
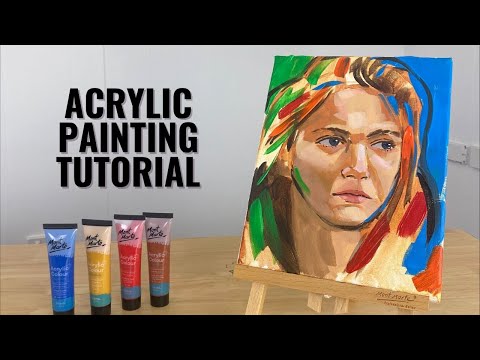
Essential materials and tools
| Item Category | Specifications |
|---|---|
| Support | Primed canvas, panel, or heavy paper |
| Drawing | Pencil, thin acrylic wash, or transfer method |
| Palette | Titanium white, yellow ochre or raw sienna, burnt sienna or burnt umber, a red (cadmium or quinacridone), ultramarine or similar blue |
| Mediums | Matte medium or retarder for thinner layers and open time |
| Brushes | Flats and rounds in a range of sizes; small detail brushes for features |
| Reference | Well-lit photo or live model with clear light direction |
| Approximate costs | A limited palette keeps expenses modest for practice portraits |
Paint quantities stay reasonable when layers remain thin. The paint coverage calculator helps estimate needs for a given portrait size.
Loading calculator...
I lay out the same core colors for every portrait so mixing stays familiar and predictable.
A thin value underpainting in earth tones or grisaille gives a reliable roadmap before any full-color skin mixtures are applied.
Key techniques and skills
- Establishing accurate proportions and feature placement with a light drawing or thin paint sketch
- Blocking a thin underpainting that maps the darkest darks and lightest lights
- Mixing a base skin tone from yellow ochre, a red, white, and a touch of blue or umber
- Varying that base with warmer notes in cheeks, nose, and ears and cooler notes in shadows
- Applying paint in thin layers that follow the planes of the face
- Softening or sharpening edges according to how the form turns toward or away from the light
- Keeping the background and hair blocked in early so skin values can be judged correctly
- Reserving pure highlights and deepest accents for later stages
- Stepping back frequently to check overall likeness and value pattern
- Using a retarder or stay-wet palette when longer blending time is needed
- Refining eyes, lips, and smaller forms only after the larger head structure reads well
- Applying a final protective varnish once the painting is fully dry
The practical order is draw, underpaint values, block local color, model form with temperature shifts, then add selective detail.

Common mistakes and how to avoid them
- Jumping to finished skin color on a white canvas. Establish values first.
- Using a single tube of “flesh” color. Mix from a small set of warmer and cooler pigments.
- Over-blending every edge. Preserve some sharper transitions where planes change direction.
- Painting eyes and lips in isolation before the surrounding forms are correct. Integrate features into the whole.
- Working only up close. Step back often to judge proportions and overall effect.
- Applying thick paint too early. Thin layers allow easier correction and luminosity.
Heavy, opaque paint applied before the value structure is solid often creates a chalky or mask-like face that is difficult to correct without scraping back.
Practical step-by-step sequence
Begin with a light, accurate drawing of the head and main features. Thin an earth tone or neutral gray with medium or water and block in the shadow shapes and darkest areas, keeping the underpainting thin and transparent. Once dry, mix a mid-value skin tone and cover the light areas, adjusting warmth and coolness as you go.
Build successive thin layers that follow the planes—forehead, cheekbones, jaw, nose—softening transitions where the form turns gradually and keeping sharper edges where planes meet. Place the background and hair early so the skin can be compared against them. Finally, refine the eyes, nostrils, lips, and smaller accents, then evaluate the portrait from a distance and make any last value or temperature adjustments.
Fresh acrylic layers feel responsive and dry quickly enough to support steady progress; each successful pass makes the next decisions clearer.
Working in distinct stages—drawing, value map, color block-in, form modeling—turned uncertain portrait attempts into a repeatable and more confident process.
Layer drying times remain short. The acrylic drying time estimator helps plan when the next pass can begin.
Loading calculator...
A portrait in acrylic succeeds when structure and value are secured first and color is built deliberately on top of that foundation.
Final thoughts
The steps to paint a portrait in acrylic—accurate drawing, value underpainting, local color, layered modeling, and restrained detail—give a clear path through a complex subject. Anyone willing to slow down at the beginning and work in successive thin layers can produce more convincing faces with less frustration. I still adjust the exact mixtures for each sitter, yet the underlying sequence remains the same and continues to deliver steadier results.