
I still remember the first full acrylic painting I completed from blank canvas to varnish. The sequence of preparation, blocking, layering, and finishing turned scattered brushwork into a coherent image. That order has guided every piece since.
How I approach the steps of acrylic painting
Acrylic painting follows a practical sequence that takes advantage of the paint’s fast drying and permanent film. The process moves from surface preparation through underpainting and opaque layers to final details and protection. Each stage builds on the one before so corrections stay simple and the surface gains depth without muddiness.
My earliest attempts jumped straight to detail and left the background unresolved. The image never settled. Working background to foreground, thin to thicker, and dark toward light produced cleaner results and fewer reworked areas.
Acrylics dry to a water-resistant film within minutes to hours, so each layer can be overpainted once touch-dry without lifting the paint beneath.
The sequence suits beginners who need clear structure and intermediate painters refining control. Advanced work still follows the same order while adding mediums and specialized techniques. Adjacent methods such as watercolor require different handling of transparency and lifting; acrylic rewards decisive layering.
Have you ever started detailing the foreground only to realize the background values were wrong?
Have you noticed how a thin underpainting sets the value structure before any local color goes down? What changes when you wait for each layer to reach touch-dry before the next?
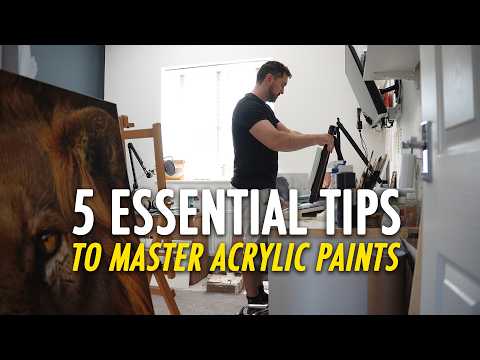
What this craft really entails
The steps of acrylic painting form a complete workflow from support to finished surface. Traditional descriptions call it the acrylic painting process or layered acrylic method. The approach developed with the commercial availability of acrylic paints in the mid-twentieth century and remains the standard for both studio and instructional work.
Core skills include preparing the support, establishing composition and values, building color in stages, refining edges and details, and protecting the completed film. Beginners can complete simple subjects by following the order closely. Intermediate painters introduce blending, glazing, and texture. Advanced users combine mediums and complex layering while still respecting the same sequence.
Compared with oil painting, acrylic steps move faster because each layer can be overpainted sooner. Compared with watercolor, the process allows opaque corrections and permanent coverage. The paint feels fluid when wet, becomes tacky as it skins, and forms a flexible film once dry.
Working from large shapes to small details and from background to foreground keeps the painting organized and reduces the need for major corrections later.
A typical session includes surface prep, a light sketch or underpainting, blocked color, successive layers, final accents, and optional varnish after full cure.
Essential materials and tools
| Item Category | Specifications |
|---|---|
| Support | Primed canvas, canvas panel, or sealed wood; gesso if the surface is unprimed |
| Acrylic paint | Heavy body or soft body artist or student grade in a basic palette of 8–12 colors |
| Brushes | Flat and round synthetics in a range of sizes; stiff brush for texture if desired |
| Palette and water | Stay-wet or disposable palette, two water jars, paper towels or rags |
| Optional mediums | Glazing medium, soft gel, retarder for extended blending time |
| Approximate costs | Basic starter set 30 to 60 dollars; individual tubes and brushes vary by brand |
The acrylic paint coverage calculator estimates paint volume needed for a given canvas size and number of layers so supplies last through the full process.
Loading calculator...
Protect the workspace with a drop cloth or plastic sheet. Acrylic stains most porous materials once dry.
Excess water in early layers can weaken the binder; keep water additions moderate or switch to medium for thinner applications.
Key techniques and skills
- Prime or confirm the support is sealed and has tooth for adhesion
- Sketch the main shapes lightly with pencil or thinned paint
- Block in large background and middle-ground areas first
- Establish dark values early so lighter colors can cover cleanly later
- Build successive thin layers, allowing each to reach touch-dry
- Blend wet-into-wet while the paint remains open or use glazing over dry layers
- Add mid-tones and local color once the value structure is secure
- Place highlights and fine details last with a smaller brush
- Step back periodically to check overall balance and edges
- Allow full cure before any varnish or heavy handling
Thin layers that dry between applications create cleaner color and stronger adhesion than one heavy application.

Common mistakes and how to avoid them
- Starting with fine detail before the large shapes are resolved: the composition drifts; block major areas first
- Painting light colors over unresolved darks: coverage suffers; establish values early
- Working wet-into-wet after the surface has skinned: the paint lifts or becomes muddy; respect drying stages
- Over-thinning every layer with water: the film weakens; use medium for controlled transparency
- Skipping the wait between layers: later paint reactivates earlier color; allow touch-dry time
- Adding varnish before the painting has cured: moisture trapped underneath can cloud the finish
- Ignoring edges and transitions until the end: hard corrections become necessary; refine as layers build
Applying thick paint over a still-wet underlayer often causes lifting, uneven drying, and loss of control over edges.
A practical walkthrough of the full sequence
Begin with a clean, primed support and a simple value sketch. Block the background and largest forms with mid-value color, keeping the paint relatively thin. Once touch-dry, reinforce the darkest areas and begin placing local color in the middle ground. Continue building toward the foreground, increasing opacity and detail only after the underlying structure is stable.
Blending can occur while paint is wet or through transparent glazes over dry layers. Final highlights and linear accents go on last. When the surface is complete, leave the painting flat for full cure—often several days to a week depending on thickness—before any protective varnish.
The order of steps is what turns separate marks into a coherent painting that holds together from a distance and up close.
The acrylic drying time estimator helps plan safe intervals between layers and the longer wait required before varnish.
Loading calculator...
Final thoughts
The steps of acrylic painting give a reliable path from blank support to finished surface. Preparation, structured layering, and patient curing produce stronger results than rushing to detail. I still follow the same sequence on every new canvas: prepare, block, build, refine, protect. The habit keeps the process calm and the surface sound.

I just picked up a set of Liquitex heavy body tubes at the local Michaels, and the pigment density is miles ahead of the student grade stuff I used previously. What is your go-to brush for maintaining sharp edges during the blocking stage? I have been using a mix of Princeton Catalyst synthetic flats, but they seem to lose their snap after about 3 weeks of daily use. Are there specific synthetic blends that hold up better against the stiff nature of heavy body acrylics? I usually keep my brushes in a jar of water while working to prevent the paint from curing into the ferrule, but I worry that constant soaking might be loosening the adhesive holding the bristles. Any tips on better cleaning habits or specific brands that survive heavy use?
Regarding brush fatigue, the issue often stems from the interaction between the high pH of professional acrylics and the epoxy in the ferrule when brushes sit submerged for long periods. Those synthetic flats are excellent for initial blocking, but I recommend alternating between two sets to allow the bristles to dry completely between sessions. For maintaining a sharp chisel edge, try cleaning them with a dedicated soap like The Masters Brush Cleaner immediately after use rather than leaving them in water. If you need a more resilient synthetic, look for brushes specifically marked for acrylics with thicker monofilament fibers, such as the Da Vinci Top-Acryl line. These are designed to resist the drag of heavy body paint without splaying prematurely.
That makes sense regarding the pH levels breaking down the adhesive. I will definitely look into that soap and try rotating my brushes to see if the snap returns. Thanks for the brand recommendation.
Rotation is key to long-term tool health. Once you incorporate a thorough cleaning routine after each session, you should see those synthetic fibers maintain their integrity much longer.