The first time I left an unvarnished acrylic panel leaning against a studio wall for a few months, a fine layer of dust settled into the soft paint film and refused to wipe away cleanly. That quiet disaster taught me that protection is not optional once a painting leaves the wet stage.
What years of finishing acrylic work have taught me about protection
Protecting an acrylic painting means applying a clear, flexible top layer that shields the soft acrylic film from dust, dirt, moisture, abrasion, and ultraviolet light. A removable varnish with UV stabilizers is the standard studio solution; an isolation coat underneath makes future cleaning safer. Proper storage and display complete the defense.
Early pieces left bare gradually collected studio dust that became part of the surface. Once I began using a polymer varnish with UVLS the colors stayed richer and the surface could be dusted without risk.
A removable acrylic polymer varnish containing UV light stabilizers provides the most practical long-term protection for finished acrylic paintings.
Spray versions suit heavily textured surfaces; brush-on liquids give more control on smoother work.
What this craft really entails
Protecting an acrylic painting involves waiting until the paint is fully cured, cleaning the surface, optionally applying an isolation coat of clear acrylic medium, then brushing or spraying thin coats of archival varnish. The varnish creates a harder, non-porous skin that resists dirt and slows UV fading while remaining removable for future conservation.
Core skills are judging complete dryness, applying even thin layers without brush marks or bubbles, and choosing the correct sheen. Beginners can start with a simple brush-on polymer varnish. Intermediate painters add an isolation coat. Advanced work often includes UV-filtering glazing or professional MSA varnish for maximum durability.
Compared with leaving the painting bare, a varnish unifies the surface sheen and makes cleaning possible. Compared with permanent craft sealers, archival removable varnishes allow later restoration without damaging the paint.
Have you ever wiped a finished acrylic only to find that everyday dust had already become embedded in the soft film?
That happens because cured acrylic remains slightly thermoplastic and attracts particles. Another common issue is varnishing too soon, trapping solvent or causing cloudiness. A third problem appears when a non-removable sealer is used and later needs correction.
Never varnish an acrylic painting that still feels cool or soft to the touch; residual moisture or uncured binder can cause clouding, adhesion failure, or cracking.
The process suits any painter who wants work to remain clean and color-stable over years. It does not require specialized equipment beyond a good varnish and a soft brush or spray can.

Essential materials and tools
| Item Category | Specifications |
|---|---|
| Varnish | Removable acrylic polymer with UVLS (Golden Polymer, Liquitex Soluvar, or equivalent); gloss, satin, or matte |
| Isolation coat | Clear acrylic medium (e.g., soft gel gloss thinned with water) |
| Application | Wide soft synthetic brush or archival spray varnish |
| Preparation | Lint-free cloth, distilled water if thinning is needed |
| Optional | UV-filtering glazing or acrylic sheet for framed work |
| Environment | Dust-free, moderate temperature and humidity |
| Approximate costs | Quality varnish $15–30 per bottle; isolation medium already in studio |
Full cure time varies with thickness and conditions. The acrylic drying time estimator helps decide when the surface is ready for varnish.
Loading calculator...
I keep a dedicated soft brush used only for varnish so no stray pigment contaminates the clear coat.
An isolation coat of thinned clear acrylic medium creates a barrier that makes later varnish removal safer for the original paint layers.
Key techniques and skills
- Waiting until the painting is fully cured—days for thin layers, up to two weeks for heavy impasto
- Dusting the surface gently with a soft, clean cloth before any coating
- Applying a thin isolation coat if using removable varnish
- Choosing gloss, satin, or matte according to the desired final look
- Brushing thin, even coats in one direction, then lightly crossing if needed
- Using spray varnish for textured or large surfaces to avoid brush marks
- Working in a dust-free space and keeping the painting horizontal while wet
- Allowing each coat to dry fully before the next
- Storing or hanging the finished work away from direct sunlight and extreme humidity
- Framing under UV-filtering glazing for additional protection when appropriate
- Labeling the reverse with the varnish type and date for future reference
- Testing a small corner or scrap first when trying a new product
The reliable order is confirm dryness, clean, isolate if desired, then varnish in thin layers.
Common mistakes and how to avoid them
- Varnishing before the paint is fully cured. Wait at least several days and longer for thick passages.
- Applying one heavy coat instead of multiple thin ones. Thick layers risk cloudiness, drips, and uneven sheen.
- Using a permanent craft sealer on work that may later need cleaning or restoration. Choose removable archival varnish.
- Brushing vigorously and introducing bubbles. Load the brush lightly and stroke smoothly.
- Varnishing in a dusty or humid room. Create a clean, stable environment before starting.
- Hanging the finished painting in direct sunlight. UV stabilizers help but do not replace sensible placement.
Never apply solvent-based varnish directly over uncured acrylic or skip the isolation coat if future removal may be required; the paint layers can be damaged.
Practical finishing sequence
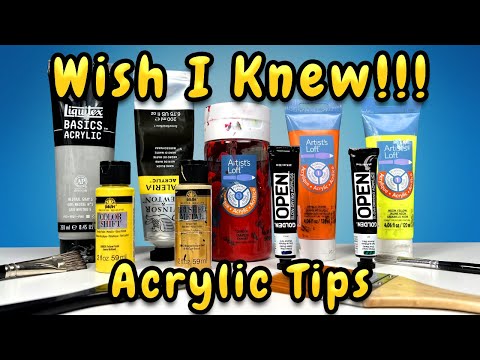
Once the painting is completely dry and free of dust, mix a thin isolation coat if desired and brush it on evenly. Allow it to dry overnight. Then apply the first thin coat of removable varnish with UVLS, working systematically across the surface. Let it dry fully, then add a second thin coat if needed. Keep the piece horizontal and covered from dust during drying. The finished surface feels harder, looks more unified, and can be gently dusted without harming the paint.
Fresh varnish smells mild and appears milky when wet, clearing as it dries to a transparent film that slightly deepens the colors.
Two thin coats of polymer varnish with UVLS have kept studio pieces free of embedded dust and noticeably more resistant to casual handling for years.
Varnish coverage is modest because the coats are thin. The paint coverage calculator helps estimate how much product a given surface will require.
Loading calculator...
A good varnish turns a soft, dust-attracting acrylic surface into a cleanable, UV-buffered film that stays true longer.
Final thoughts
Protecting an acrylic painting is a straightforward final step once the paint is fully cured: clean, isolate if wanted, and apply thin coats of removable varnish with UV protection. Anyone who has watched dust settle permanently into bare acrylic can prevent the same problem with a single afternoon of careful finishing. I now treat varnish as part of the painting process rather than an optional afterthought, and the work stays cleaner and more stable as a result.