Chemistry was never my strong suit in school, but the moment I poured a caustic lye solution into a bowl of golden oils and watched them transform into creamy, raw soap, I was hooked. There is a primal satisfaction in taking dangerous raw materials and transmuting them into something gentle and cleansing.
- My Journey with Soap Chemistry
- What This Craft Really Entails
- Essential Materials and Tools
- Key Techniques and Skills
- Skill Level and Time Investment
- Advantages and Challenges
- Real Project Applications
- The Learning Experience
- Comparison with Similar Crafts
- Common Questions from Fellow Crafters
- My Personal Results and Insights
- Final Thoughts and My Recommendation
My Journey with Soap Chemistry
I still remember the first time I bought a canister of sodium hydroxide. I treated it like a bomb, wearing safety goggles, heavy rubber gloves, and long sleeves in the middle of July.

But when that mixture thickened to “trace” just like the books said it would, the fear turned into awe. It felt like alchemy in its purest form.
Soap making is the perfect marriage of precise science and artistic expression, where exact measurements yield infinite creativity.
Over the years, I’ve moved from simple olive oil bars to complex swirls involving titanium dioxide and mica. I learned that the chemistry isn’t something to fear; it’s the language you speak to get the results you want.
What This Craft Really Entails
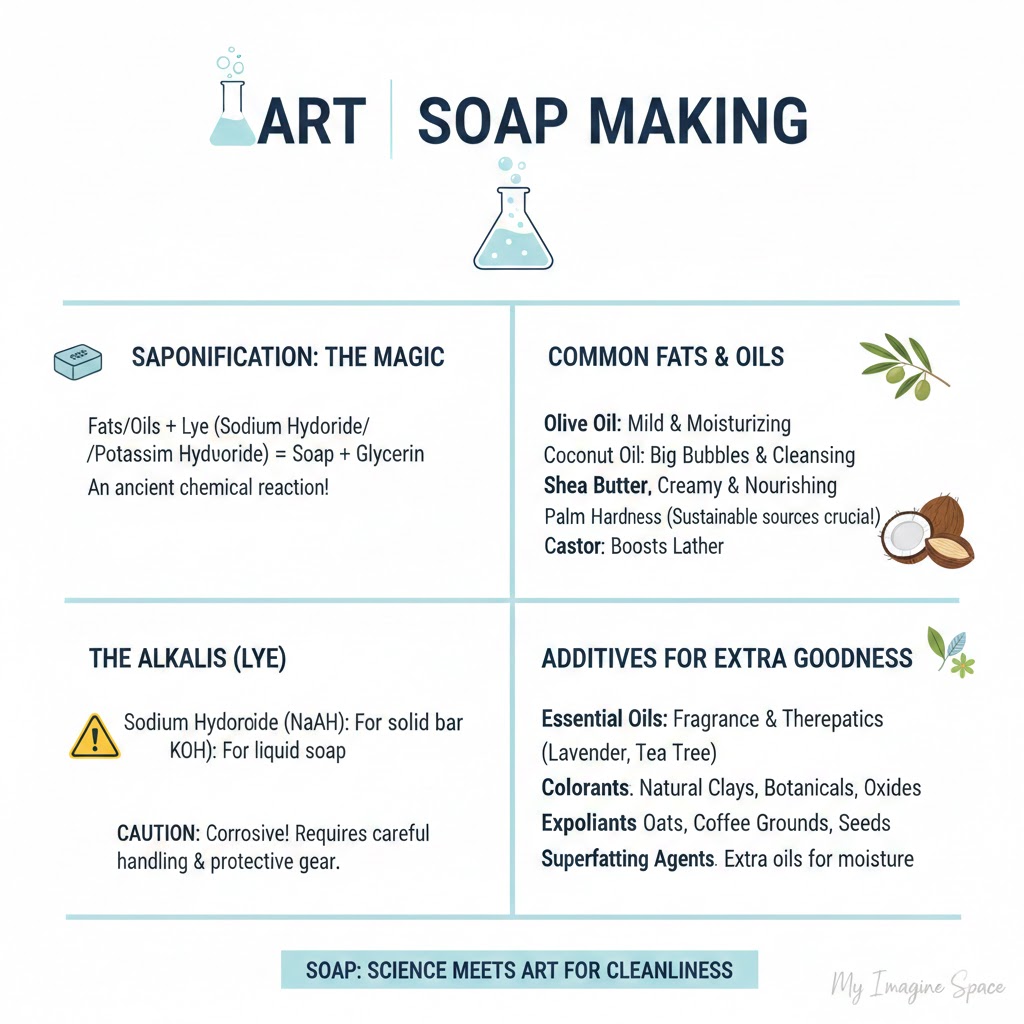
At its core, soap making (specifically Cold Process) is a chemical reaction called saponification. It sounds intimidating, doesn’t it? But it’s simply the act of an acid neutralizing a base.
You take fatty acids (oils and butters) and introduce them to a strong alkali (sodium hydroxide dissolved in water). When they meet, they battle it out and eventually settle down to become a salt.
That salt is what we call soap. Unlike “melt and pour” crafting, where you decorate a pre-made base, this method requires you to be the chemist. You control every single molecule that goes into the bar.
This craft is ideal for those who love precision but crave artistic freedom. It requires patience, as the chemical bonds take weeks to fully mature and harden.
Saponification is an exothermic reaction, meaning it generates its own heat; your bowl can reach temperatures over 160°F without ever touching a stove.
If you enjoy baking, you’ll likely enjoy soap making. Both rely on exact weights and specific ordering of ingredients to achieve a chemical rise or transformation.
However, unlike a cake, you can’t taste the batter to see if it’s right. You have to trust the math and the process implicitly.
Essential Materials and Tools
The chemical list for soap making is specific. You cannot substitute items loosely like you might in cooking.
| Item Category | Specifications |
|---|---|
| The Alkali (Base) | Sodium Hydroxide (100% pure lye) in flake or bead form. Drain cleaners often contain heavy metals, so buy food-grade or tech-grade from suppliers. |
| The Solvent | Distilled water is mandatory. Tap water contains minerals that can interfere with the chemical bonding, causing “dreaded orange spots” or rancidity. |
| The Fatty Acids | A blend of oils. Common choices include Olive Oil (conditioning), Coconut Oil (cleansing/bubbles), and Palm or Lard (hardening). |
| Safety Gear | Heavy-duty rubber gloves (dish gloves work), splash-proof safety goggles, and a long-sleeved shirt. |
| Tools | Stainless steel or #5 plastic polypropylene containers. An immersion blender (stick blender) and a precise digital scale. |
Key Techniques and Skills
Mastering soap chemistry involves several distinct skills that go beyond just stirring.
- Lye Solution Mixing: Dissolving sodium hydroxide into water safely without inhaling fumes.
- Temperature Management: Bringing both oils and lye water to similar temperatures (usually 100°F-120°F) to ensure proper emulsification.
- Identifying Trace: Recognizing the moment the emulsion is stable and won’t separate, which looks like thin pudding.
- Superfatting: Calculating extra oil into the recipe to ensure 100% of the lye is used up, leaving moisture for the skin.
- Gel Phase Promotion: Insulating the mold to force the soap to heat up, creating brighter colors and a harder bar.
- Curing: Storing soap in airflow for 4-6 weeks to allow excess water to evaporate and the crystal structure to harden.
- pH Testing: Verifying the soap is safe to use (around pH 9-10) using “zap tests” or phenol drops.
- Handling Acceleration: reacting quickly when fragrance oils containing alcohol or spices cause the soap to harden instantly.
Skill Level and Time Investment
This isn’t a craft you can rush. The chemistry dictates the timeline, not your schedule.
| Skill Level | Time Investment | Key Milestones |
|---|---|---|
| Beginner | 3-4 hours active time | Learning safety protocols, measuring correctly, making a basic uncolored batch. |
| Intermediate | 5-6 hours active time | Introducing colors (micas/oxides), managing different oil blends, swirling techniques. |
| Advanced | Multi-day processes | Creating transparent soap, liquid soap (using Potassium Hydroxide), or intricate landscape designs. |
The hardest part of the learning curve is usually understanding the “Trace” stages. Pour too thin, and your colors muddy; pour too thick, and you can’t mold it.
Advantages and Challenges
There is a reason this ancient craft has seen a massive resurgence, but it isn’t without its headaches.
I haven’t bought store soap in fifteen years, and my eczema has completely vanished because I control the ingredients.
- Total Control: You decide exactly what touches your skin, eliminating harsh detergents found in commercial bars.
- Cost Effective: Once you have the equipment, a loaf of soap (10 bars) costs a fraction of boutique prices.
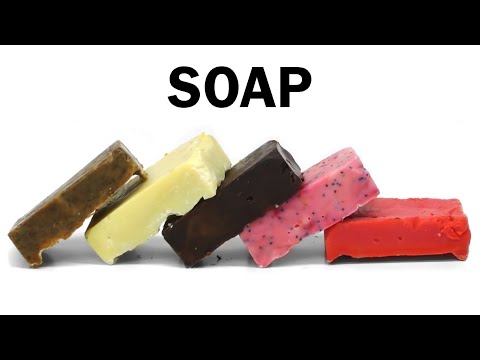
- Creative Outlet: You can design soaps that look like gemstones, desserts, or abstract art.
- Therapeutic Rhythm: The process of weighing and stirring is deeply meditative and grounding.
- Eco-Friendly: You can eliminate plastic waste completely by making naked bars.
- Giftability: Everyone needs soap, making it the most practical handmade gift possible.
However, the chemistry doesn’t always cooperate with our plans.
- Safety Risks: Lye is caustic and can cause blindness or severe burns if mishandled.
- Patience Required: You cannot use the product immediately; the 4-6 week cure time tests your patience.
- Seizing: Certain fragrance oils can solidify your batter in seconds, ruining the design.
- Initial Investment: Good molds and a dedicated stick blender can cost a bit upfront.
Real Project Applications
One of my favorite projects was a “Seascape” bar I made for a summer craft exchange. I used indigo powder for the blue, which is a natural chemical pH indicator that shifts color in the alkaline environment.
I layered sandy-colored soap at the bottom with crushed walnut shells for exfoliation, then poured various shades of blue on top. The chemical reaction of the indigo created a stunning, deep denim blue that synthetic dyes rarely achieve.
Another practical application is making 100% coconut oil laundry bars with 0% superfat. These bars are incredibly hard and stripping, which is terrible for skin but miraculous for getting stains out of clothes.
I grated these bars down into a powder to make my own laundry detergent. It shows how tweaking the fatty acid profile changes the chemical function of the final product entirely.
Have you ever considered that the same chemistry that cleans your silk blouse can also scrub a mechanic’s greasy hands, just by changing the ratio of oils?
The Learning Experience
Beginners often freeze up when they hear the word “lye.” I certainly did. But once you respect the chemical rather than fear it, the process becomes rhythmic.
A common mistake I see is people trying to substitute oils without running the math. Each oil has a specific SAP (saponification) value, meaning it requires a specific amount of lye to turn into soap.
If you swap olive oil for coconut oil without recalculating, you might end up with a lye-heavy bar that burns skin, or a soft, greasy mess that never hardens.
Always run every single recipe through a soap calculator online, even if you found it in a book, to ensure the lye ratios are safe.
My breakthrough moment came when I stopped trying to force the soap to look perfect and focused on the temperature. I realized that temperature controls the speed of the chemical reaction.
Comparison with Similar Crafts
Many people confuse Cold Process soap with Melt and Pour, but they are chemically distinct worlds.
| Aspect | Cold Process (Chemistry) | Melt & Pour | Hot Process |
|---|---|---|---|
| Method | Chemical reaction from scratch | Melting a pre-saponified base | Cooking the reaction in a crockpot |
| Cure Time | 4-6 Weeks | Hours | 1 week (usable immediately but soft) |
| Customization | 100% Ingredient control | Additives only (scent/color) | 100% Ingredient control |
| Texture | Smooth, creamy, hard | Glycerine-heavy, sweats | Rustic, bumpy, “mashed potato” look |
Common Questions from Fellow Crafters
Q: Will the lye burn my skin when I use the finished soap?
A: No. Through the magic of saponification, the lye is chemically transformed. There is no lye left in a properly made bar of soap; it has all turned into salt and glycerin.
Q: Can I use vinegar to neutralize lye burns on my skin?
A: This is a myth. Flushing with massive amounts of water is the only safe protocol. Vinegar can actually create a thermal reaction on the skin that makes the burn worse initially.
Q: Why did my soap develop a white powdery layer on top?
A: That is soda ash. It happens when unsaponified lye reacts with carbon dioxide in the air. It’s harmless and washes off, but you can prevent it by spraying rubbing alcohol on the wet soap.
Q: Can I use food coloring to dye my soap?
A: Generally, no. The high pH of the raw soap will usually morph food dyes into ugly browns or grays. You need stable oxides or micas.
Q: How do I know if my soap is safe to use?
A: If it zaps your tongue like a 9-volt battery, it’s still caustic. If it tastes like soap, the reaction is complete.
Q: Why is my soap soft after three weeks?
A: You likely used too much soft oil (like olive or sunflower) or too much water. It will harden eventually, but it might take months.
My Personal Results and Insights
I keep a detailed logbook of every batch, noting the weather, humidity, and exact temperatures.
| Project Type | Outcome |
|---|---|
| Pure Castile (100% Olive) | Slimy for 6 months, then cured into the mildest, hardest bar imaginable. worth the wait. |
| Goat Milk Soap | Scorched the sugars (turned orange) because I didn’t freeze the milk first. Lesson learned on heat management. |
| Salt Bars | Hard as a rock in 2 hours. Must cut immediately or you need a saw. Incredible exfoliation. |
I once ruined an entire batch by using a fragrance oil that wasn’t rated for soap. It caused “ricing,” where the soap separates into little hard pellets swimming in oil.
I tried to stick blend it back together, but the chemical separation was permanent. I had to throw five pounds of ingredients away.
Always buy fragrances from reputable soap suppliers who test for acceleration and discoloration, not from general craft stores.

Final Thoughts and My Recommendation
Soap making is more than just a hobby; it is a fascinating dive into domestic chemistry. It empowers you to take control of what you put on your body and offers an endless playground for artistic design.
The most critical rule is to always add your lye crystals to the water, never pour water onto lye, to prevent a volcanic eruption.
I highly recommend this craft to anyone who is detail-oriented and patient. If you love the idea of creating something from scratch that is both beautiful and functional, this is for you.
However, if you have small children or pets that cannot be kept out of the kitchen for a few hours, or if you are uncomfortable handling hazardous materials, you might want to start with melt and pour bases instead.
For me, the thrill of cutting into a new loaf of soap to reveal the hidden design inside never gets old. It requires dedication to learn the safety protocols, but the reward of a perfectly cured, handmade bar of soap is absolutely worth the effort.


