Embroidery is a fun and creative way to add a personal touch to any fabric item. Whether you’re a beginner or an experienced embroiderer, starting a new project can be exciting. Before you begin, it’s important to understand the basics of embroidery, such as the types of fabrics and threads to use, the different types of stitches, and the tools you’ll need. With the right supplies and a bit of practice, you’ll be able to create beautiful embroidered pieces in no time.
How to Choose the Right Embroidery Thread for Your Project
When it comes to embroidery, the right thread can make all the difference! Choosing the right thread for your project can be a daunting task, but it doesn’t have to be. With a few simple tips, you can find the perfect thread for your project in no time.
First, consider the type of fabric you’re working with. Different fabrics require different types of thread. For example, if you’re working with a lightweight fabric, you’ll want to use a lightweight thread. On the other hand, if you’re working with a heavier fabric, you’ll want to use a heavier thread.

Finally, consider the type of stitch you’ll be using. Different stitches require different types of thread. For example, if you’re using a satin stitch, you’ll want to use a thread that has a bit of shine to it. On the other hand, if you’re using a backstitch, you’ll want to use a thread that is matte.
By following these simple tips, you can easily find the perfect thread for your project. With the right thread, your project will look beautiful and professional. So don’t be afraid to experiment and find the perfect thread for your project!
Tips for Choosing the Right Embroidery Hoop
When it comes to embroidery, having the right hoop is essential for achieving the perfect stitch. But with so many different types of hoops available, it can be hard to know which one is right for you. Here are some tips to help you choose the perfect embroidery hoop for your project:
- Consider the size of your project. If you’re working on a large piece of fabric, you’ll need a larger hoop to accommodate it. On the other hand, if you’re working on a smaller piece, a smaller hoop will do the trick.
- Think about the type of fabric you’re using. Different fabrics require different types of hoops. For example, if you’re working with a delicate fabric, you’ll need a hoop with a softer grip to avoid damaging the fabric.
- Consider the type of embroidery you’re doing. If you’re doing a lot of intricate work, you’ll need a hoop with a tighter grip to keep the fabric in place.
- Look for a hoop that’s easy to use. You want a hoop that’s easy to adjust and secure, so you can focus on your embroidery instead of struggling with the hoop.
By following these tips, you’ll be sure to find the perfect embroidery hoop for your project. With the right hoop, you’ll be able to create beautiful embroidery that will last for years to come.
How to Transfer Your Design onto Fabric for Embroidery
Are you ready to take your embroidery designs to the next level? Transferring your designs onto fabric is a great way to make sure your embroidery looks its best. Here’s how to do it!
First, you’ll need to gather your supplies. You’ll need a piece of fabric, a pencil, a light box or window, and a transfer paper. You can find transfer paper at most craft stores.
Next, place your fabric on the light box or window. Make sure it’s flat and smooth. Then, place your transfer paper on top of the fabric. Make sure the design side of the paper is facing down.
Now, trace your design onto the transfer paper. Use a light touch and make sure you’re tracing the design accurately. Once you’ve finished tracing, carefully remove the transfer paper from the fabric.
Finally, place the transfer paper onto the fabric. Make sure the design side is facing down. Use a hot iron to press the paper onto the fabric. Make sure you press firmly and evenly.
And that’s it! You’ve successfully transferred your design onto fabric for embroidery. Now you’re ready to start stitching! Have fun and enjoy your beautiful embroidery!
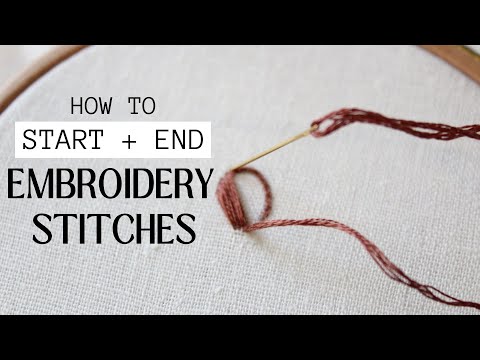
The Basics of Embroidery Stitches and How to Use Them
Embroidery is a fun and creative way to add a unique touch to any project. Whether you’re a beginner or a seasoned pro, there are a variety of stitches to choose from to create beautiful designs. From the classic backstitch to the intricate French knot, each stitch has its own unique look and purpose. Here’s a quick guide to the basics of embroidery stitches and how to use them.
The backstitch is one of the most popular and versatile stitches used in embroidery. It’s great for outlining shapes and creating bold lines. To make a backstitch, start by bringing your needle up through the fabric and then back down a short distance away. Bring the needle up again at the end of the stitch and repeat.
The running stitch is another popular stitch used in embroidery. It’s great for outlining shapes and creating texture. To make a running stitch, start by bringing your needle up through the fabric and then back down a short distance away. Bring the needle up again at the end of the stitch and repeat.
The stem stitch is a great stitch for outlining shapes and creating curved lines. To make a stem stitch, start by bringing your needle up through the fabric and then back down a short distance away. Bring the needle up again at the end of the stitch and repeat.
The French knot is a great stitch for adding texture and dimension to your embroidery. To make a French knot, start by bringing your needle up through the fabric and then wrap the thread around the needle twice. Bring the needle back down through the fabric and pull the thread tight.
The satin stitch is a great stitch for filling in shapes and creating solid blocks of color. To make a satin stitch, start by bringing your needle up through the fabric and then back down a short distance away. Bring the needle up again at the end of the stitch and repeat.
Embroidery is a fun and creative way to add a unique touch to any project. With a little practice and patience, you can create beautiful designs with a variety of stitches. So grab your needle and thread and get stitching!

How to Choose the Right Embroidery Needles for Your Project
When it comes to embroidery, the right needle can make all the difference! Choosing the right needle for your project can be a daunting task, but it doesn’t have to be. With a few simple tips, you can find the perfect needle for your project in no time.
- First, consider the type of fabric you’ll be working with. Different fabrics require different needles. For example, if you’re working with a lightweight fabric, you’ll need a finer needle. If you’re working with a heavier fabric, you’ll need a thicker needle.
- Next, consider the type of thread you’ll be using. Different threads require different needles. For example, if you’re using a thicker thread, you’ll need a thicker needle. If you’re using a finer thread, you’ll need a finer needle.
- Finally, consider the type of stitch you’ll be using. Different stitches require different needles. For example, if you’re using a running stitch, you’ll need a sharp needle. If you’re using a backstitch, you’ll need a blunt needle.
With these tips in mind, you’ll be able to find the perfect needle for your project in no time. So don’t be intimidated by the task of choosing the right needle – just remember to consider the fabric, thread, and stitch you’ll be using, and you’ll be ready to go!
Conclusion
Embroidery is a great way to express yourself and create beautiful pieces of art. To get started, you will need to choose the right fabric, thread, and needle for your project. You will also need to decide on a design and transfer it onto the fabric. Once you have all the supplies and the design ready, you can start stitching. With practice and patience, you can create beautiful embroidery pieces that you can be proud of.